Dell Boomi
Dell Boomi is a cloud-based integration platform as a service (iPaaS) that enables organizations to connect applications, data, and processes across on-premises and cloud environments.
You must have an admin account in Dell Boomi.
1 Go to Dashboard > Marketplace > SSO Integrations.
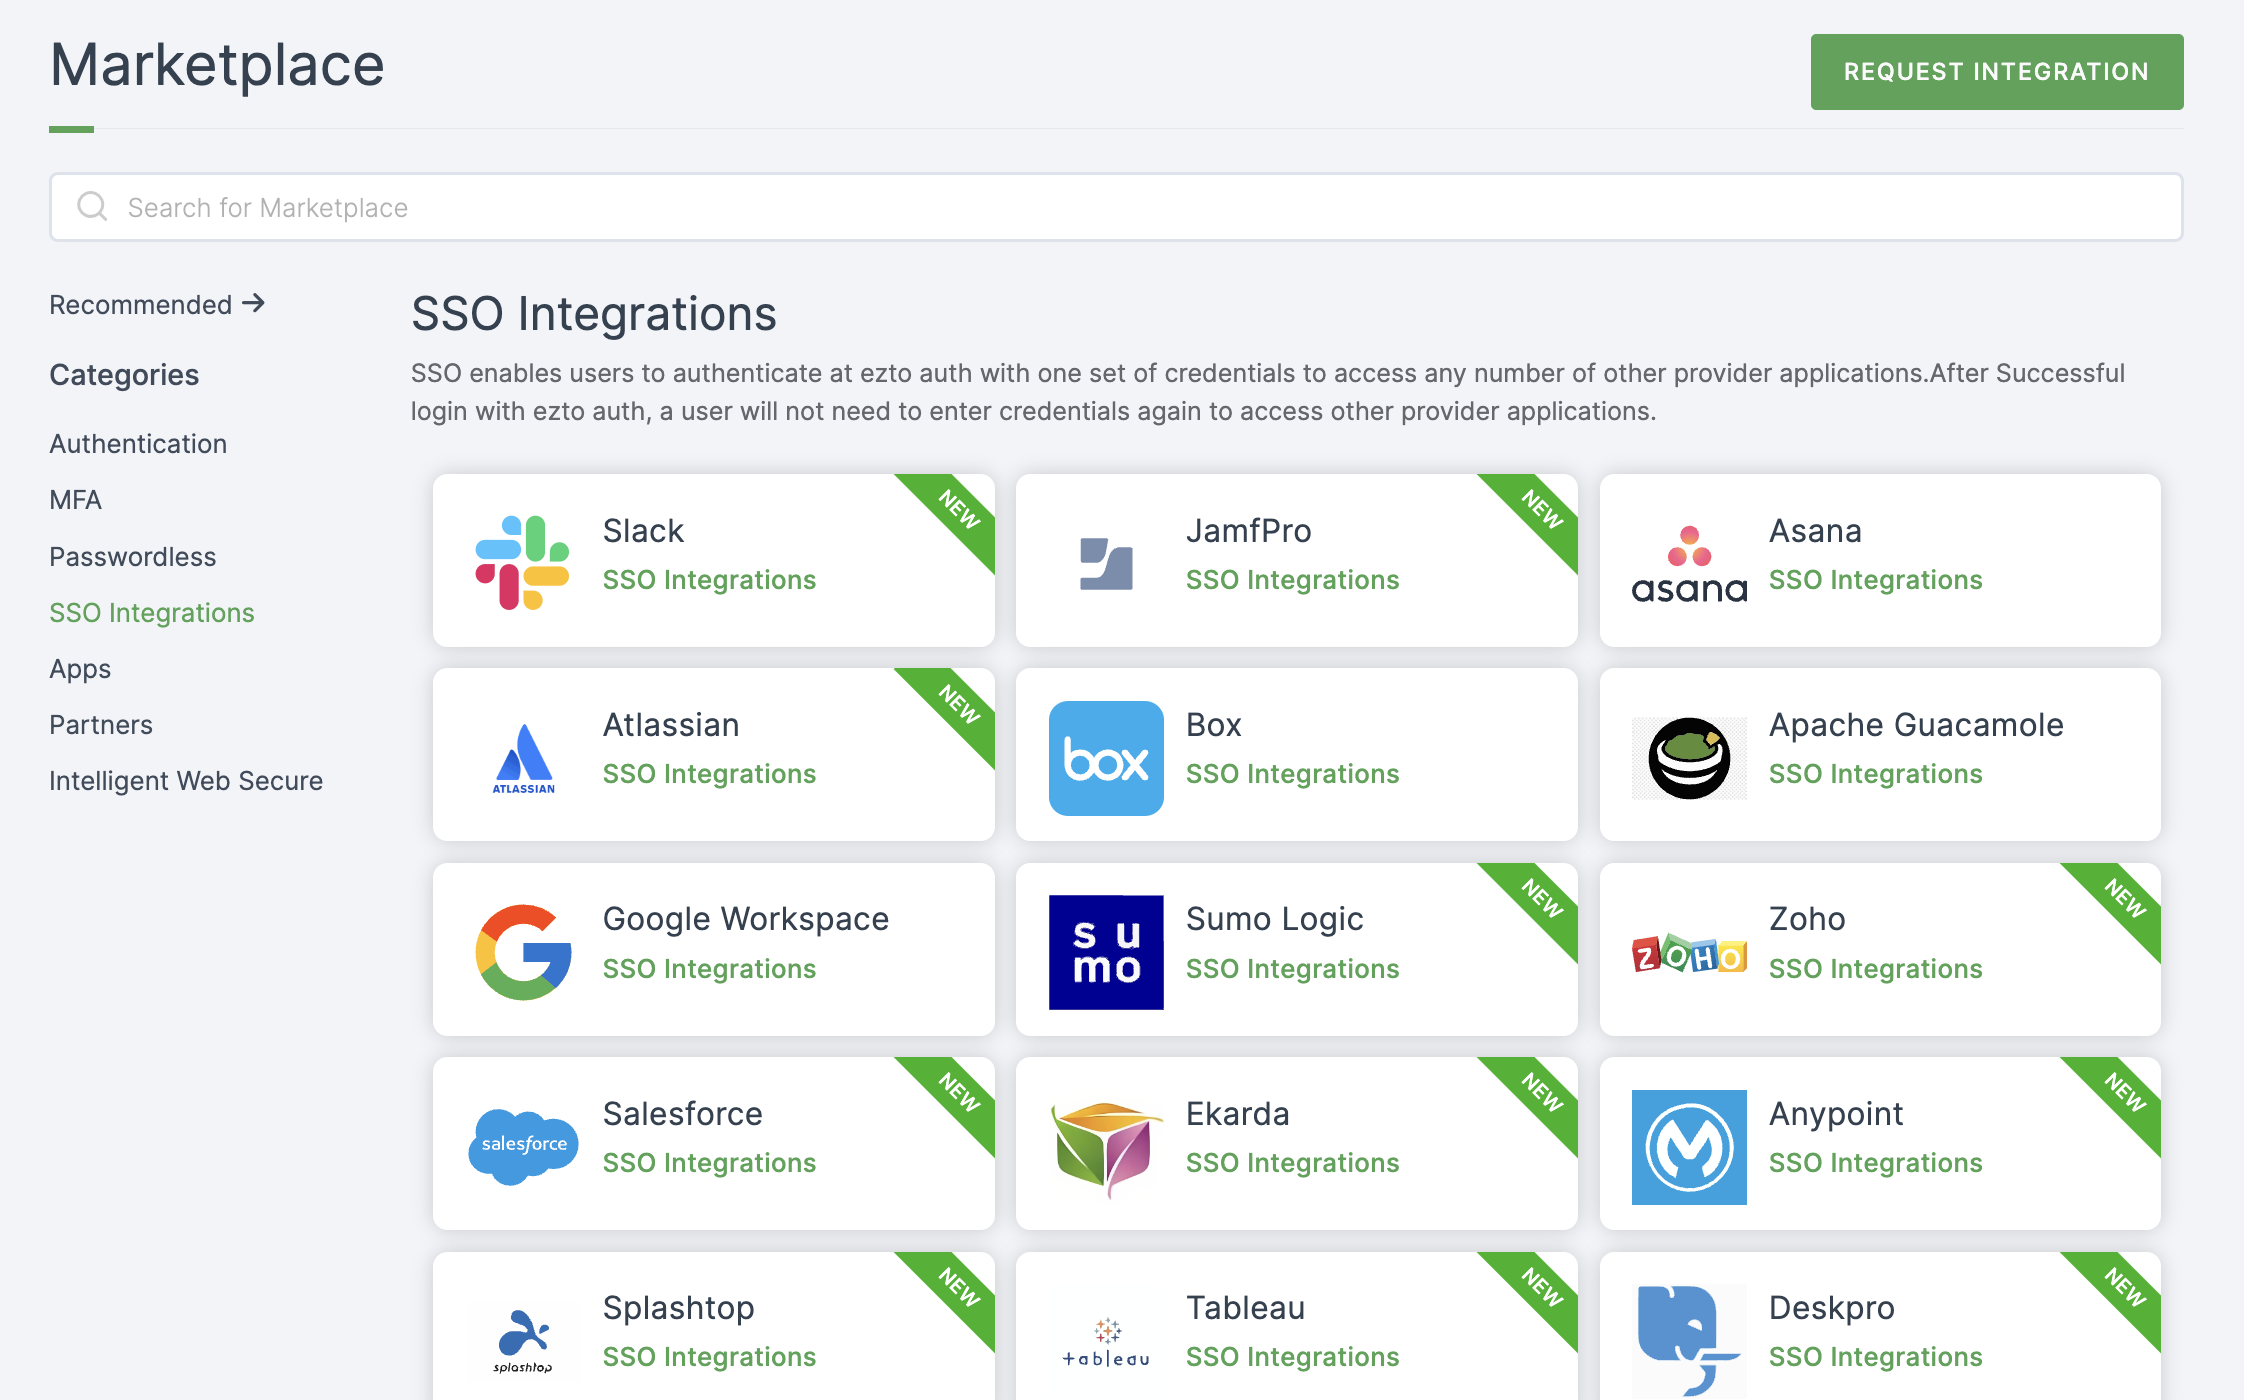
2 Select Dell Boomi from the list.
3 You'll land on the overview page, with an additional tab: Installation (providing a step-by-step installation guide).
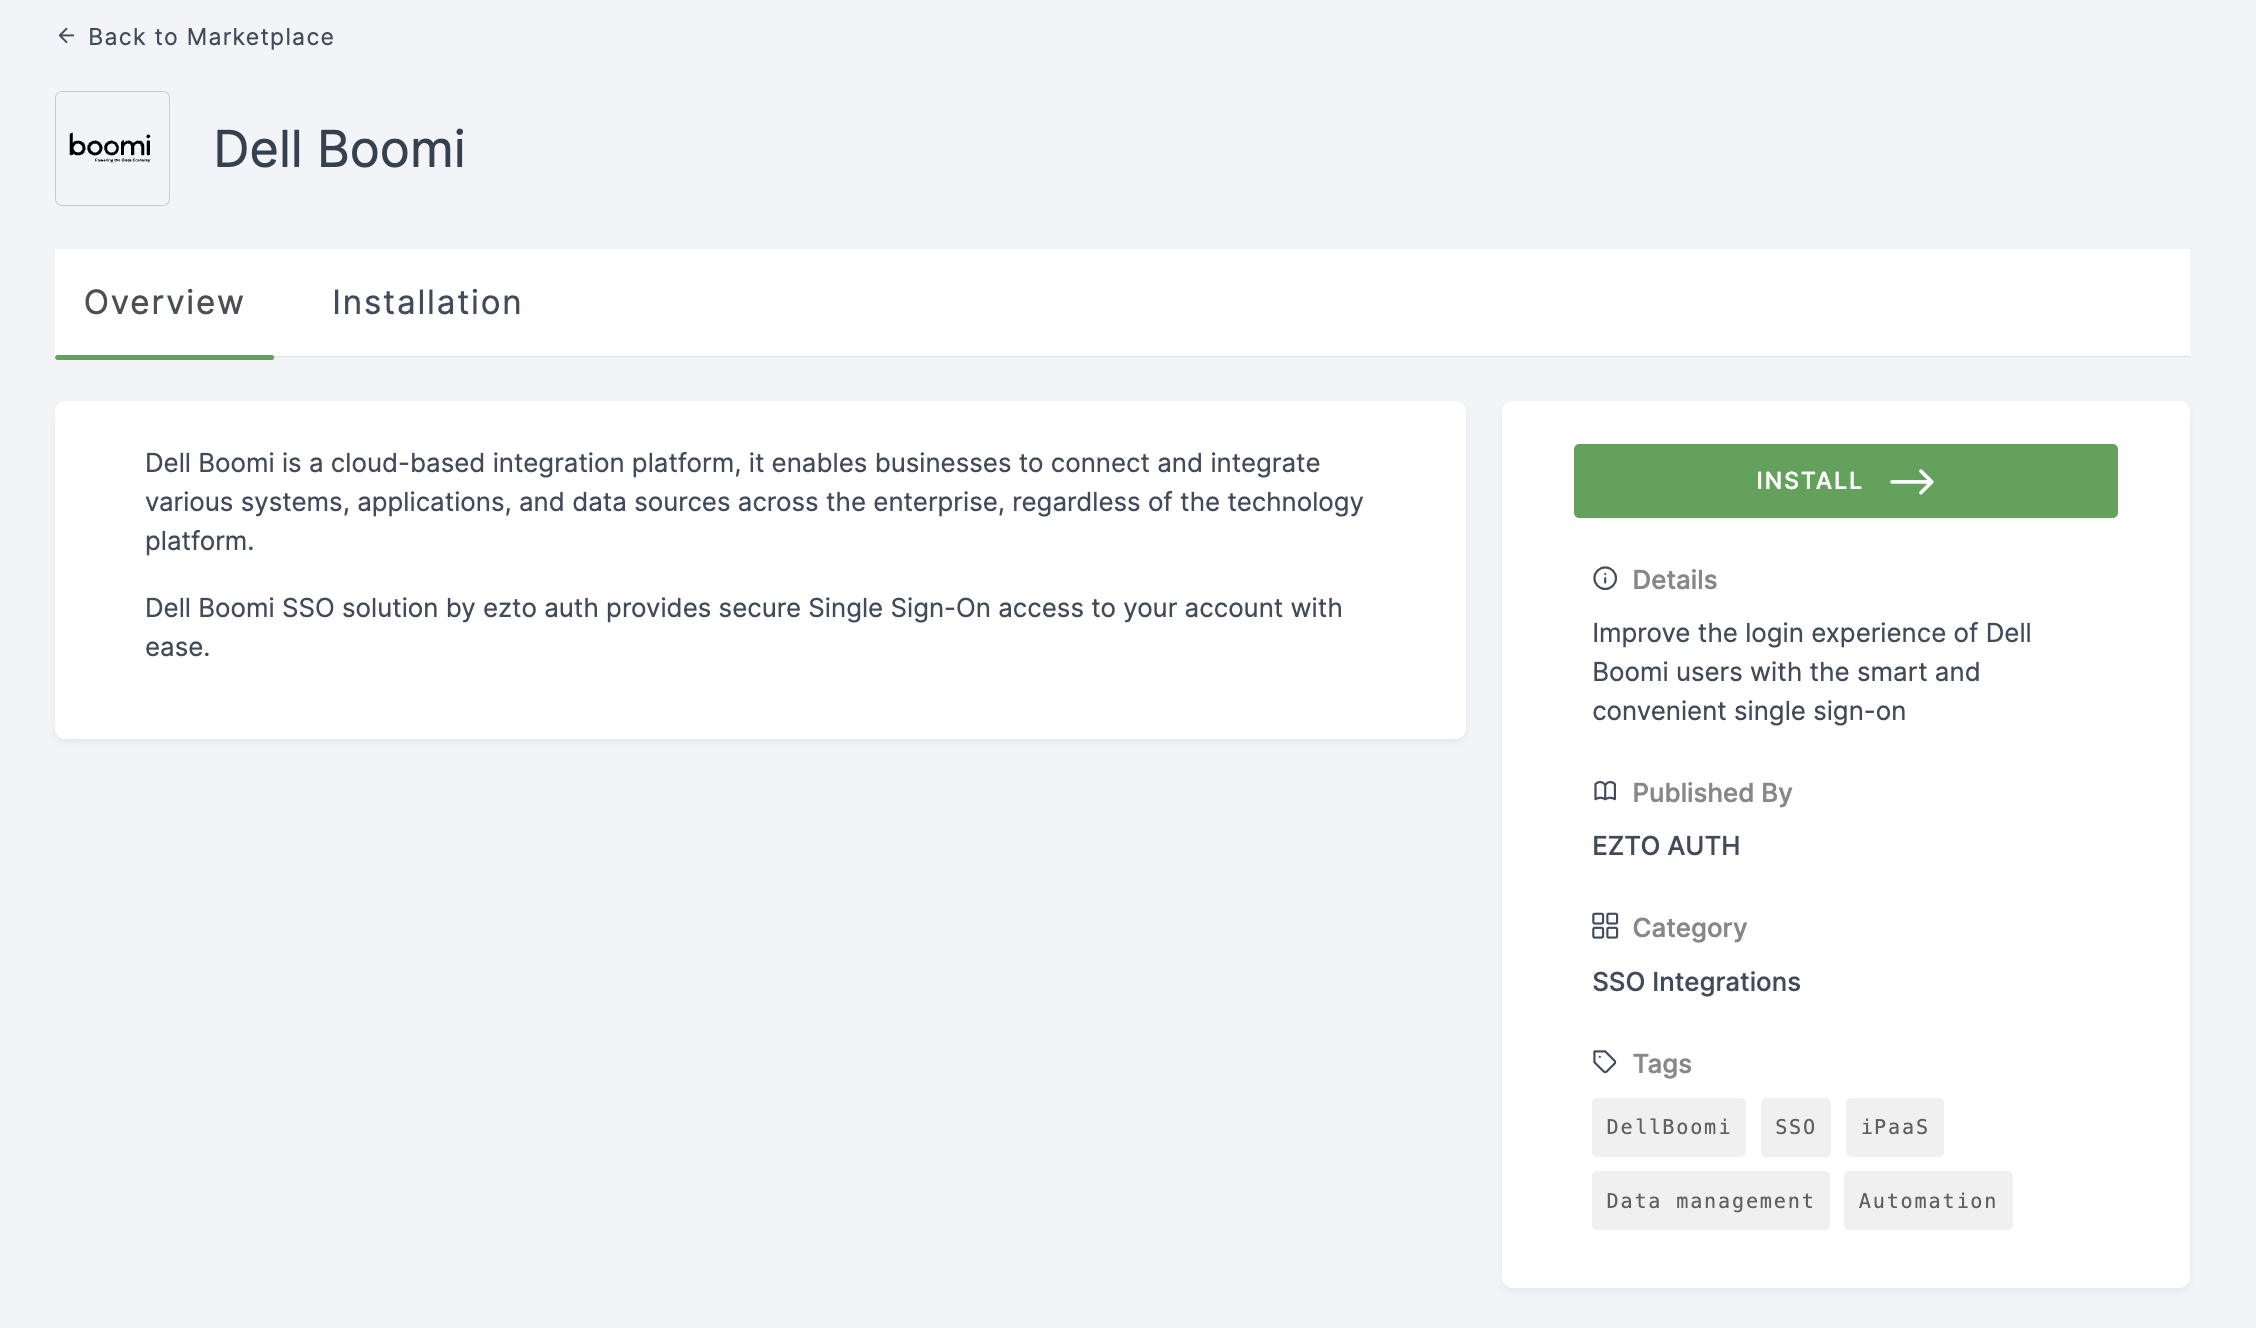
4 Click on INSTALL.
5 Provide a Name and for Entity ID, go to your Dell Boomi dashboard.
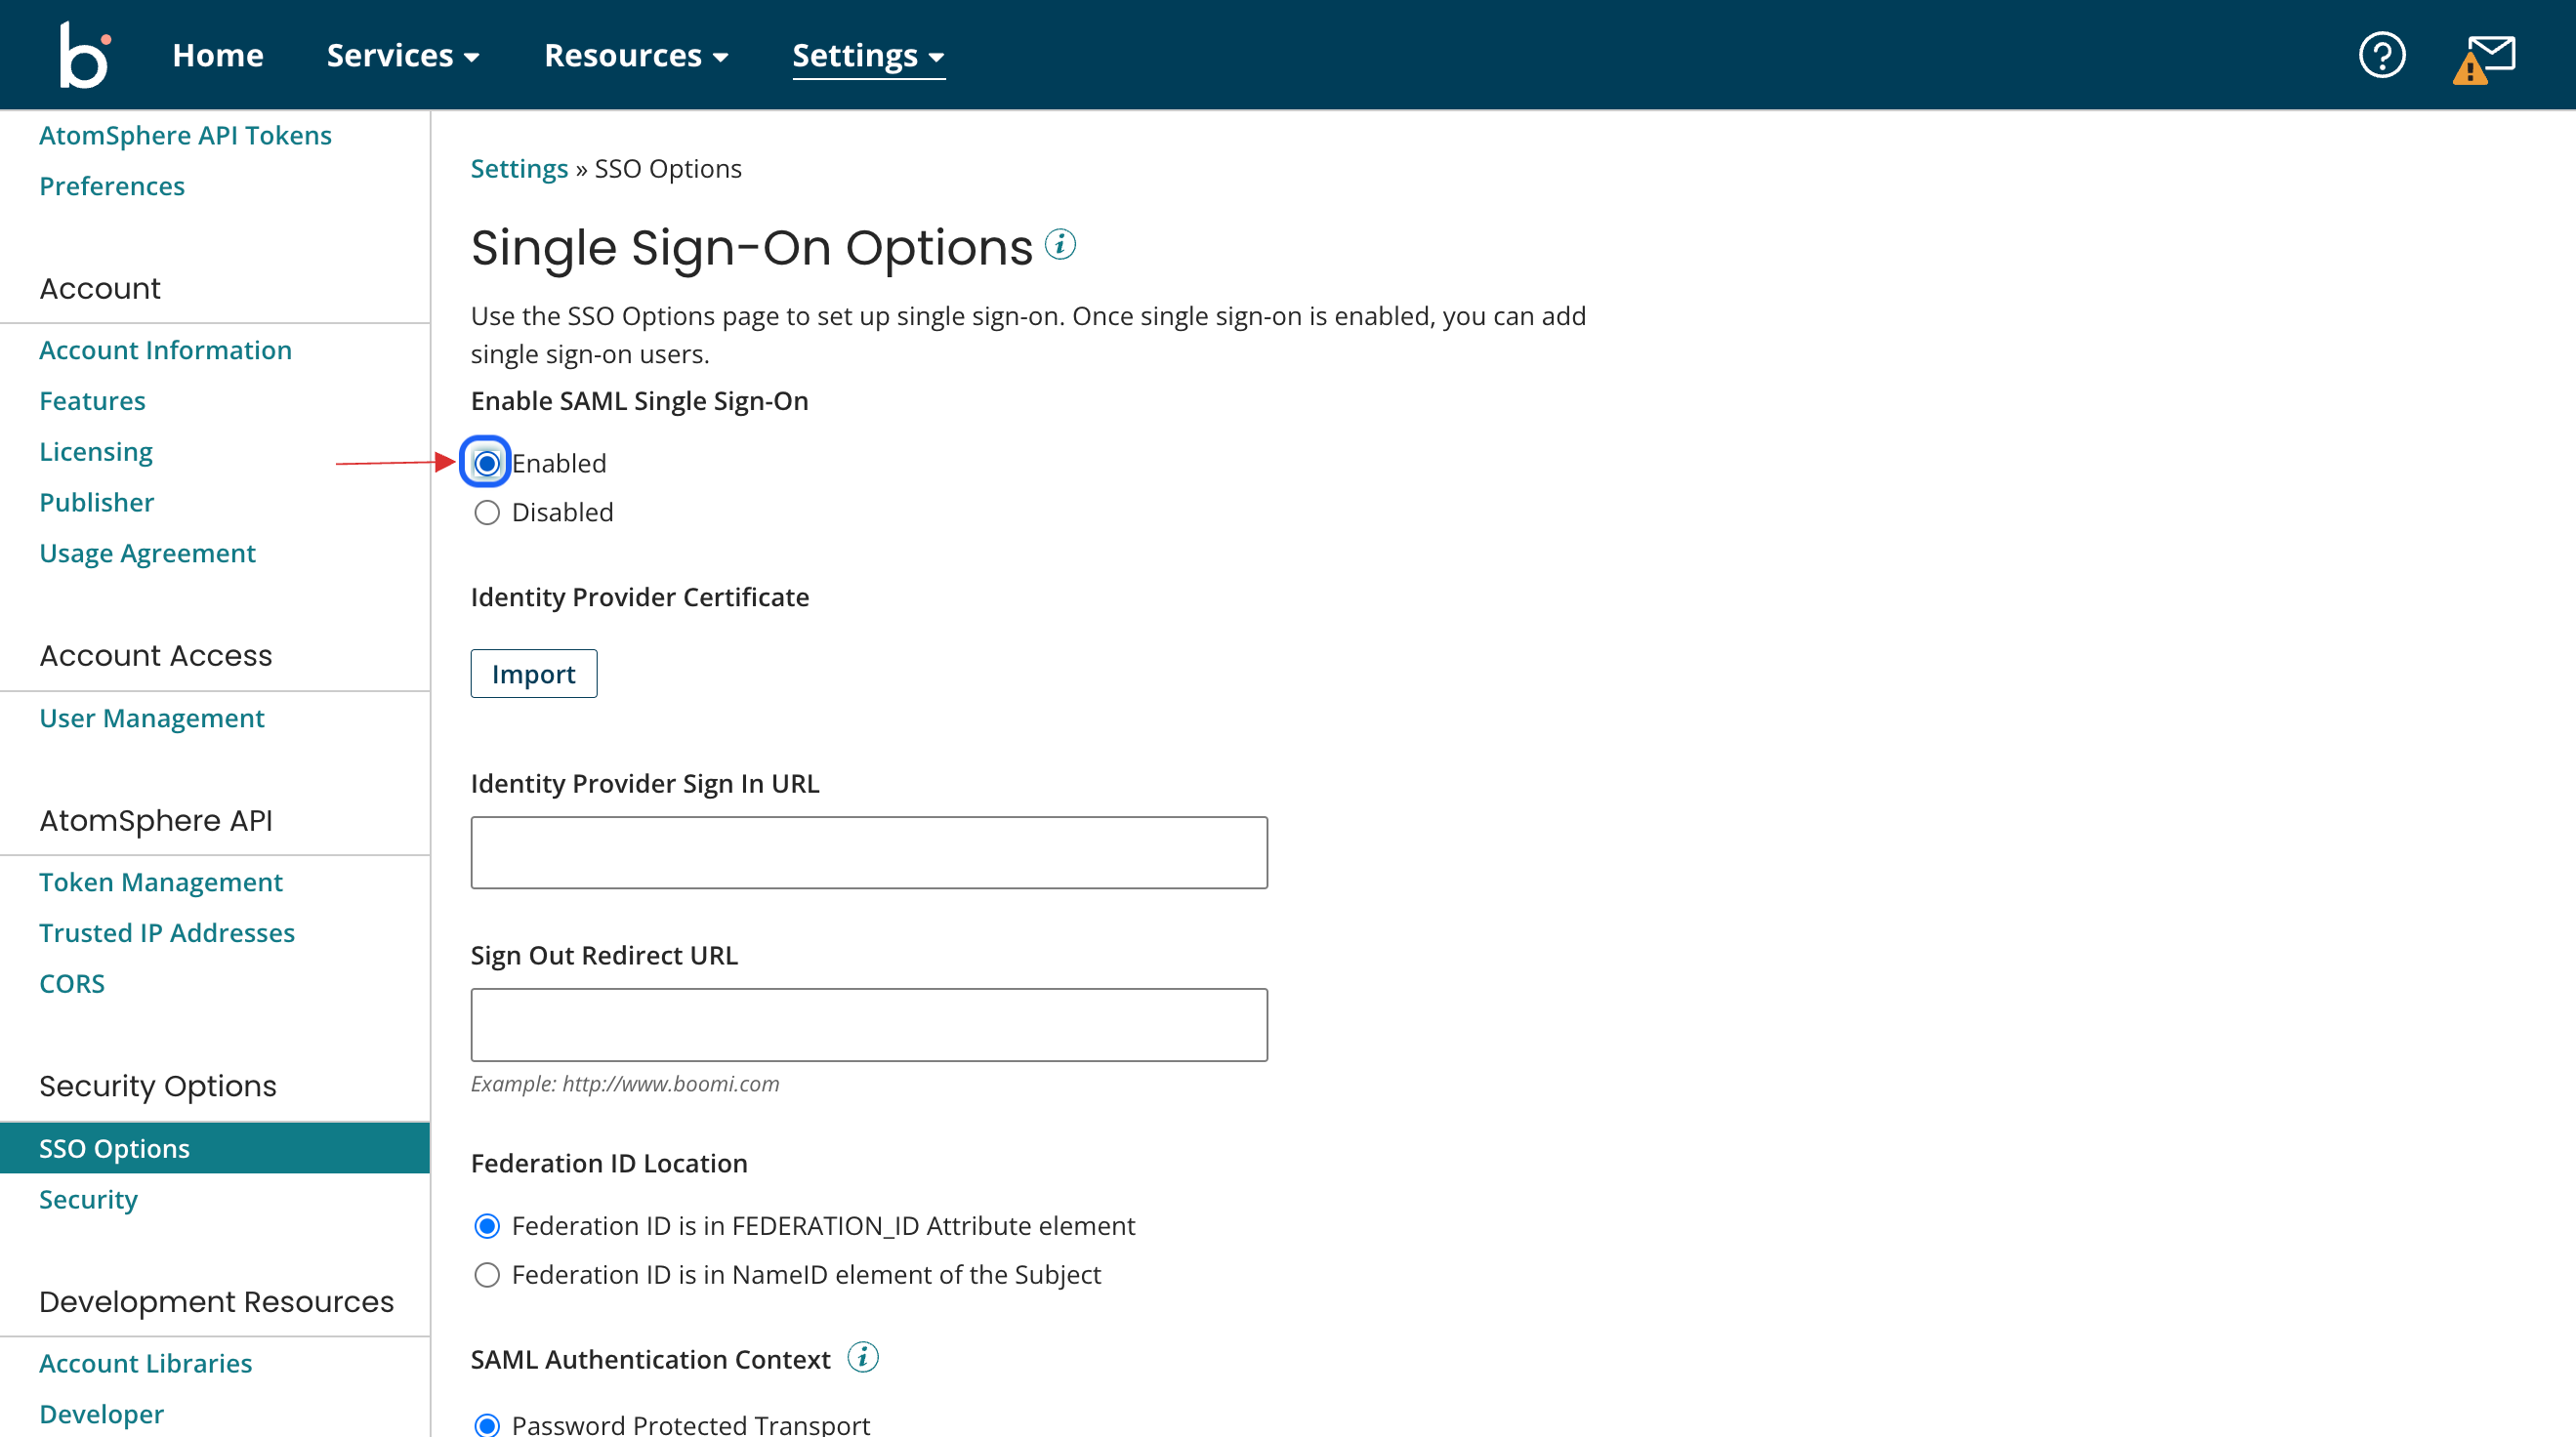
6 Click on Settings > Account Information and Setup.

7 Under Security Options, click on SSO Options.
8 Check Enabled, for Enable SAML Single Sign-On.
9 Scroll down, copy the AtomSphere Sign In URL.

10 Return to dashboard, paste the AtomSphere Sign In URL in Entity ID.

11 Switch to Dell Boomi, copy the value between /sso/ and /saml from AtomSphere Sign In URL. This is your Dell Boomi SSO AccountID.

12 Return to dashboard, paste it in Dell Boomi SSO AccountID.
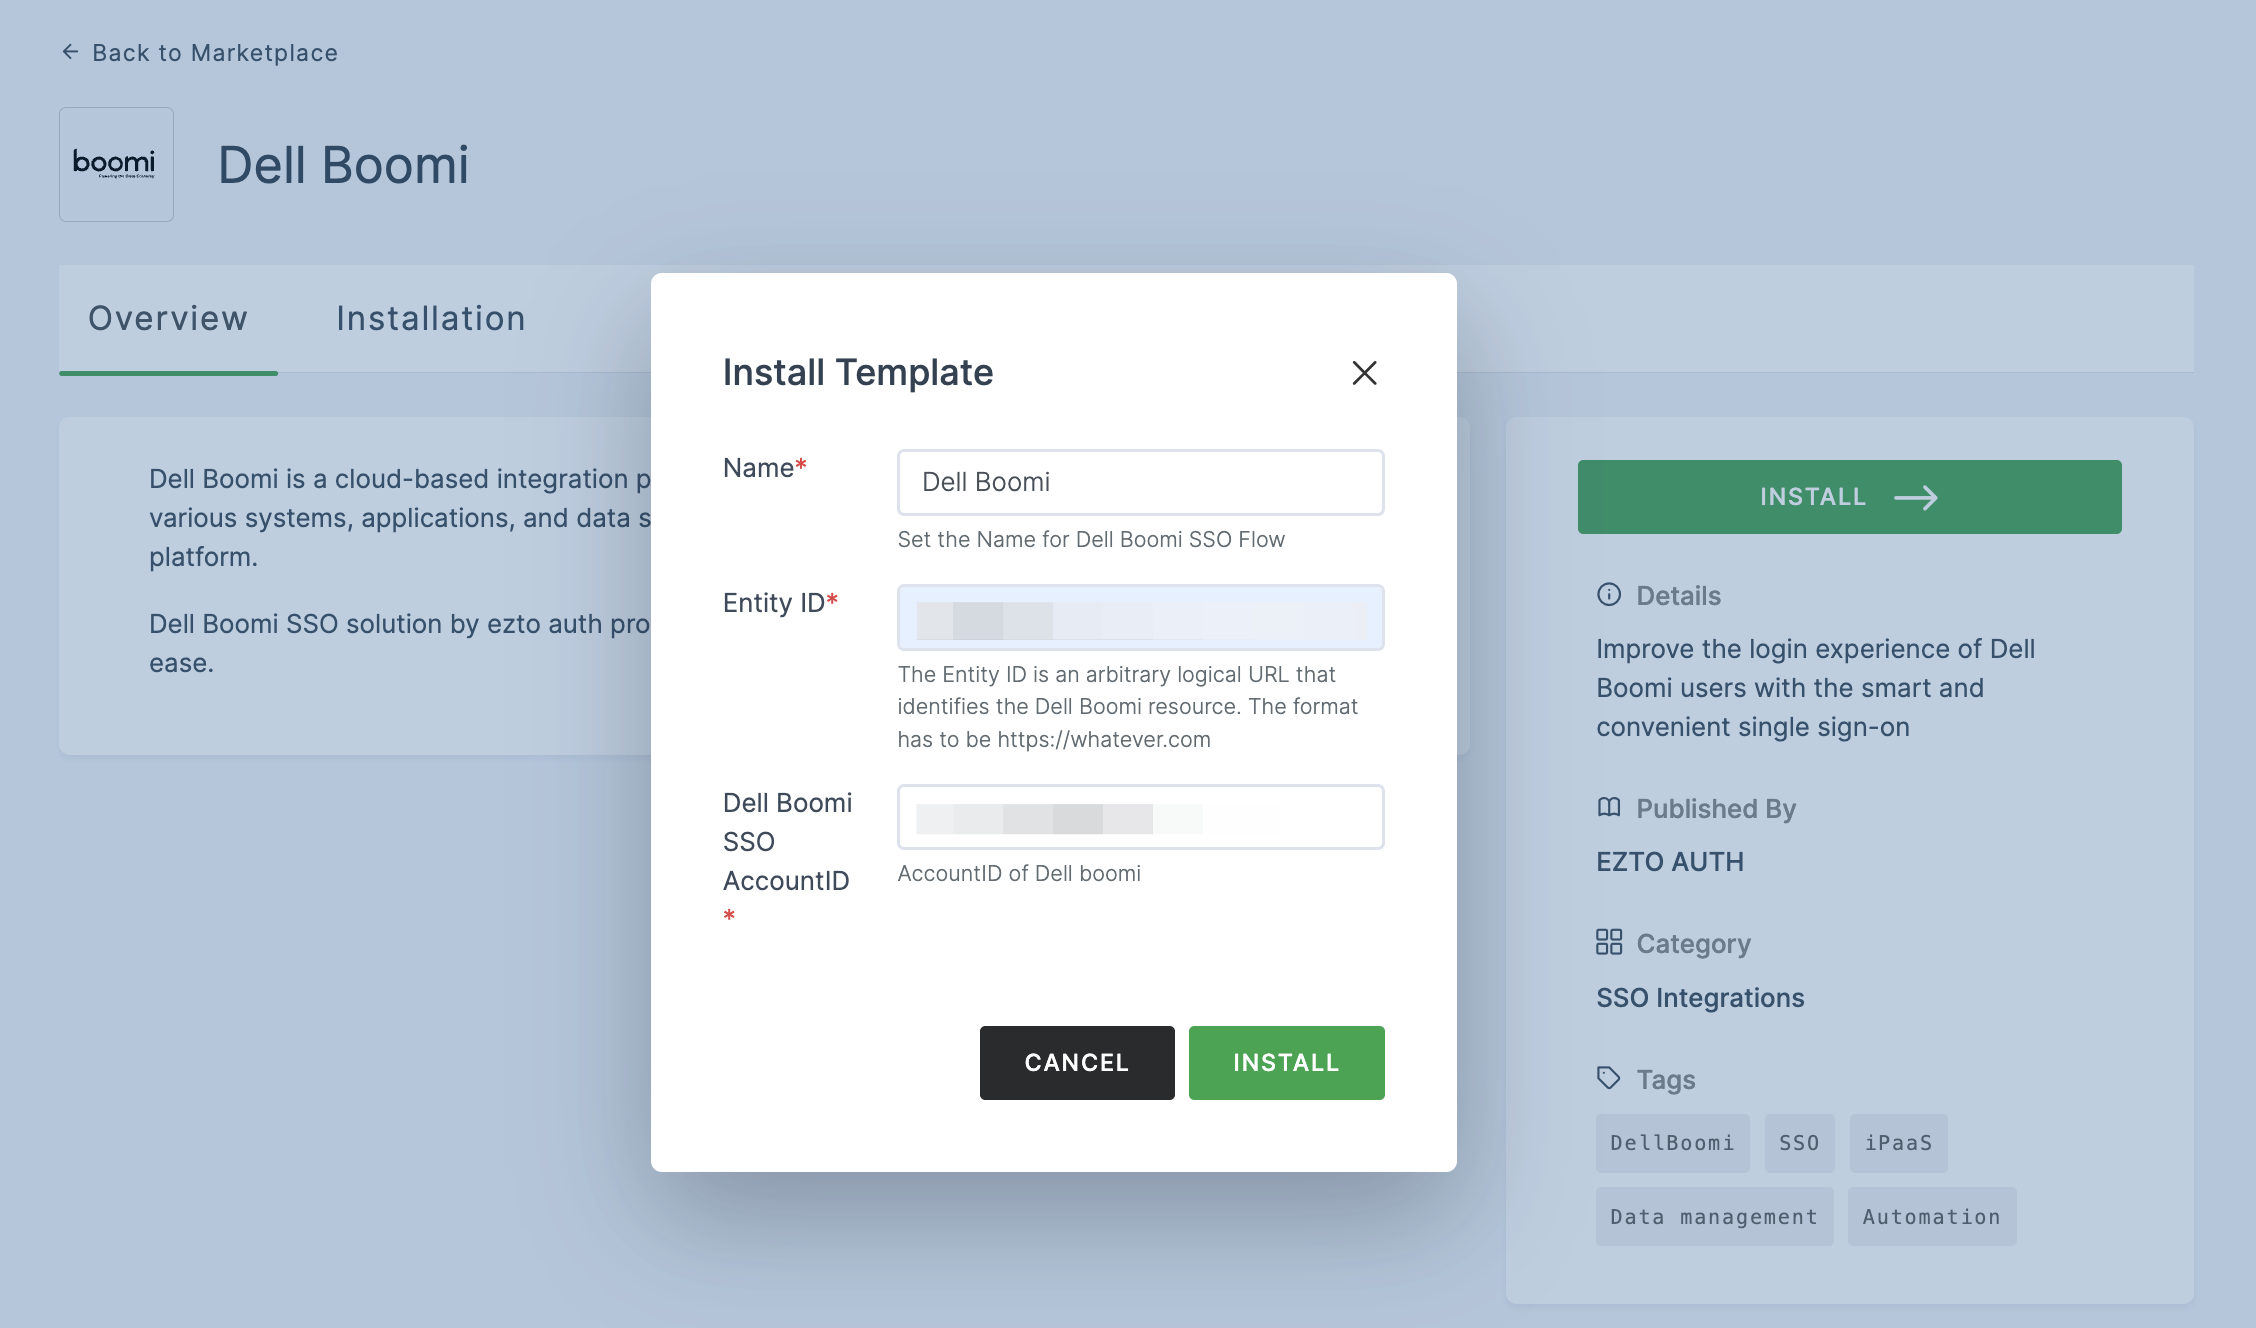
13 Once the configurations are provided, click on INSTALL.
14 Navigate to Applications > SSO, and click on the created Dell Boomi SSO.

11 Click on Metadata, where the list of endpoints for the particular SSO will be available. Copy the Login Endpoint.
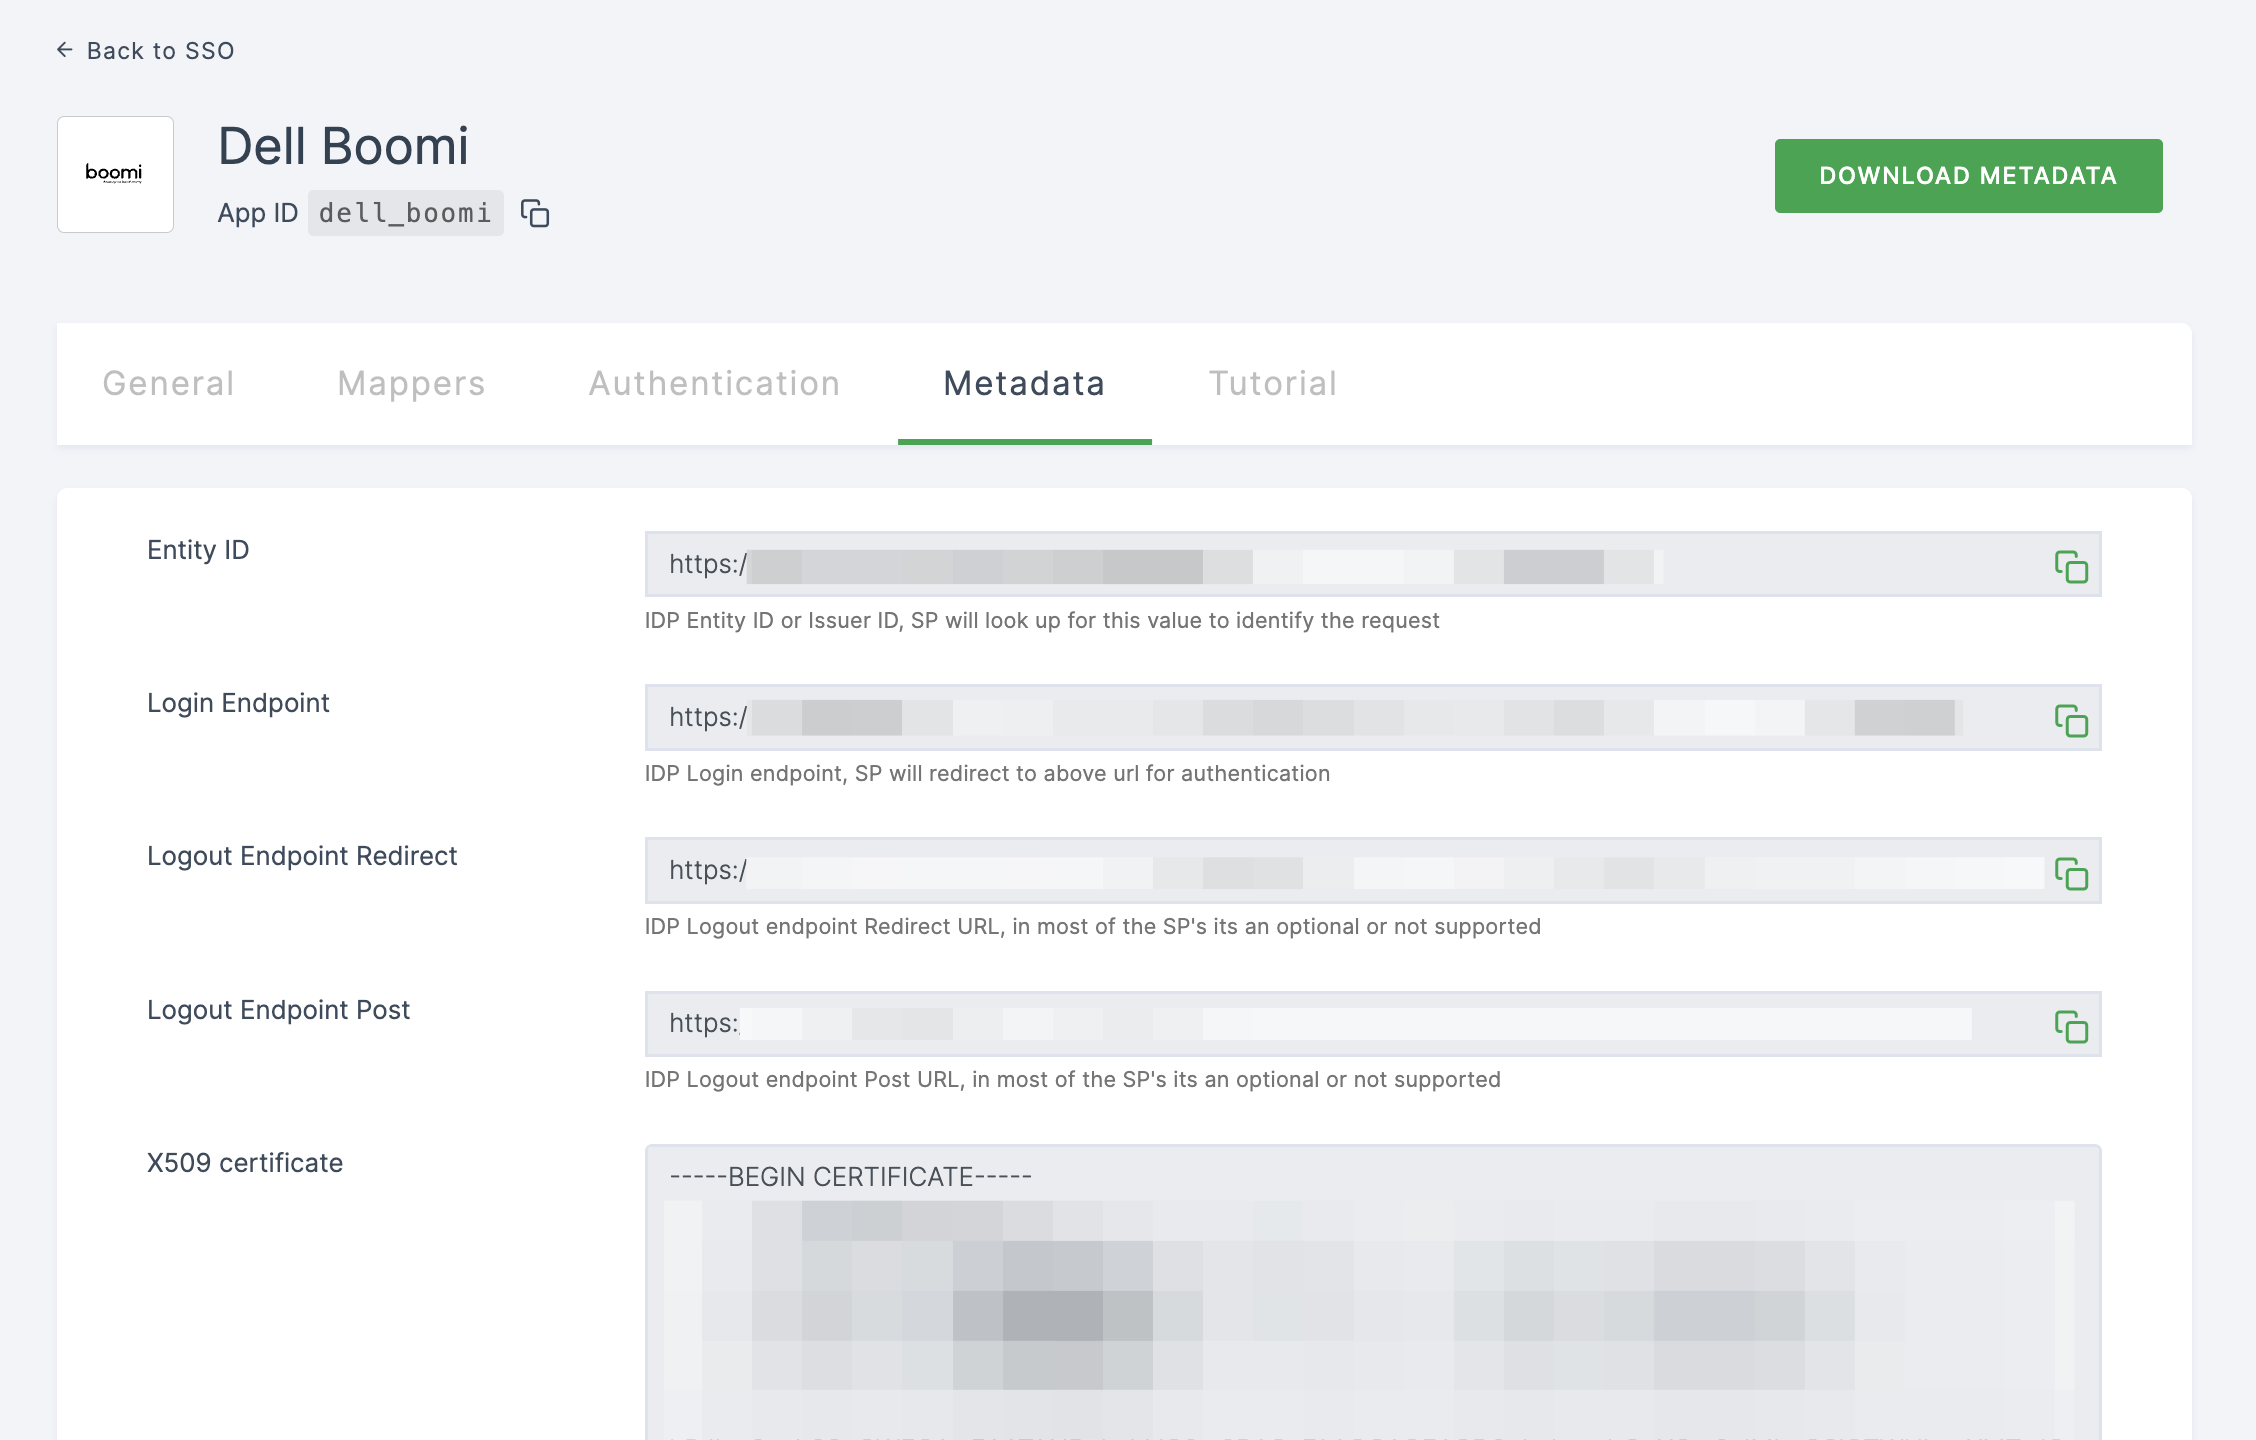
12 Switch to Dell Boomi, paste the Login Endpoint in Identity Provider Sign In URL.

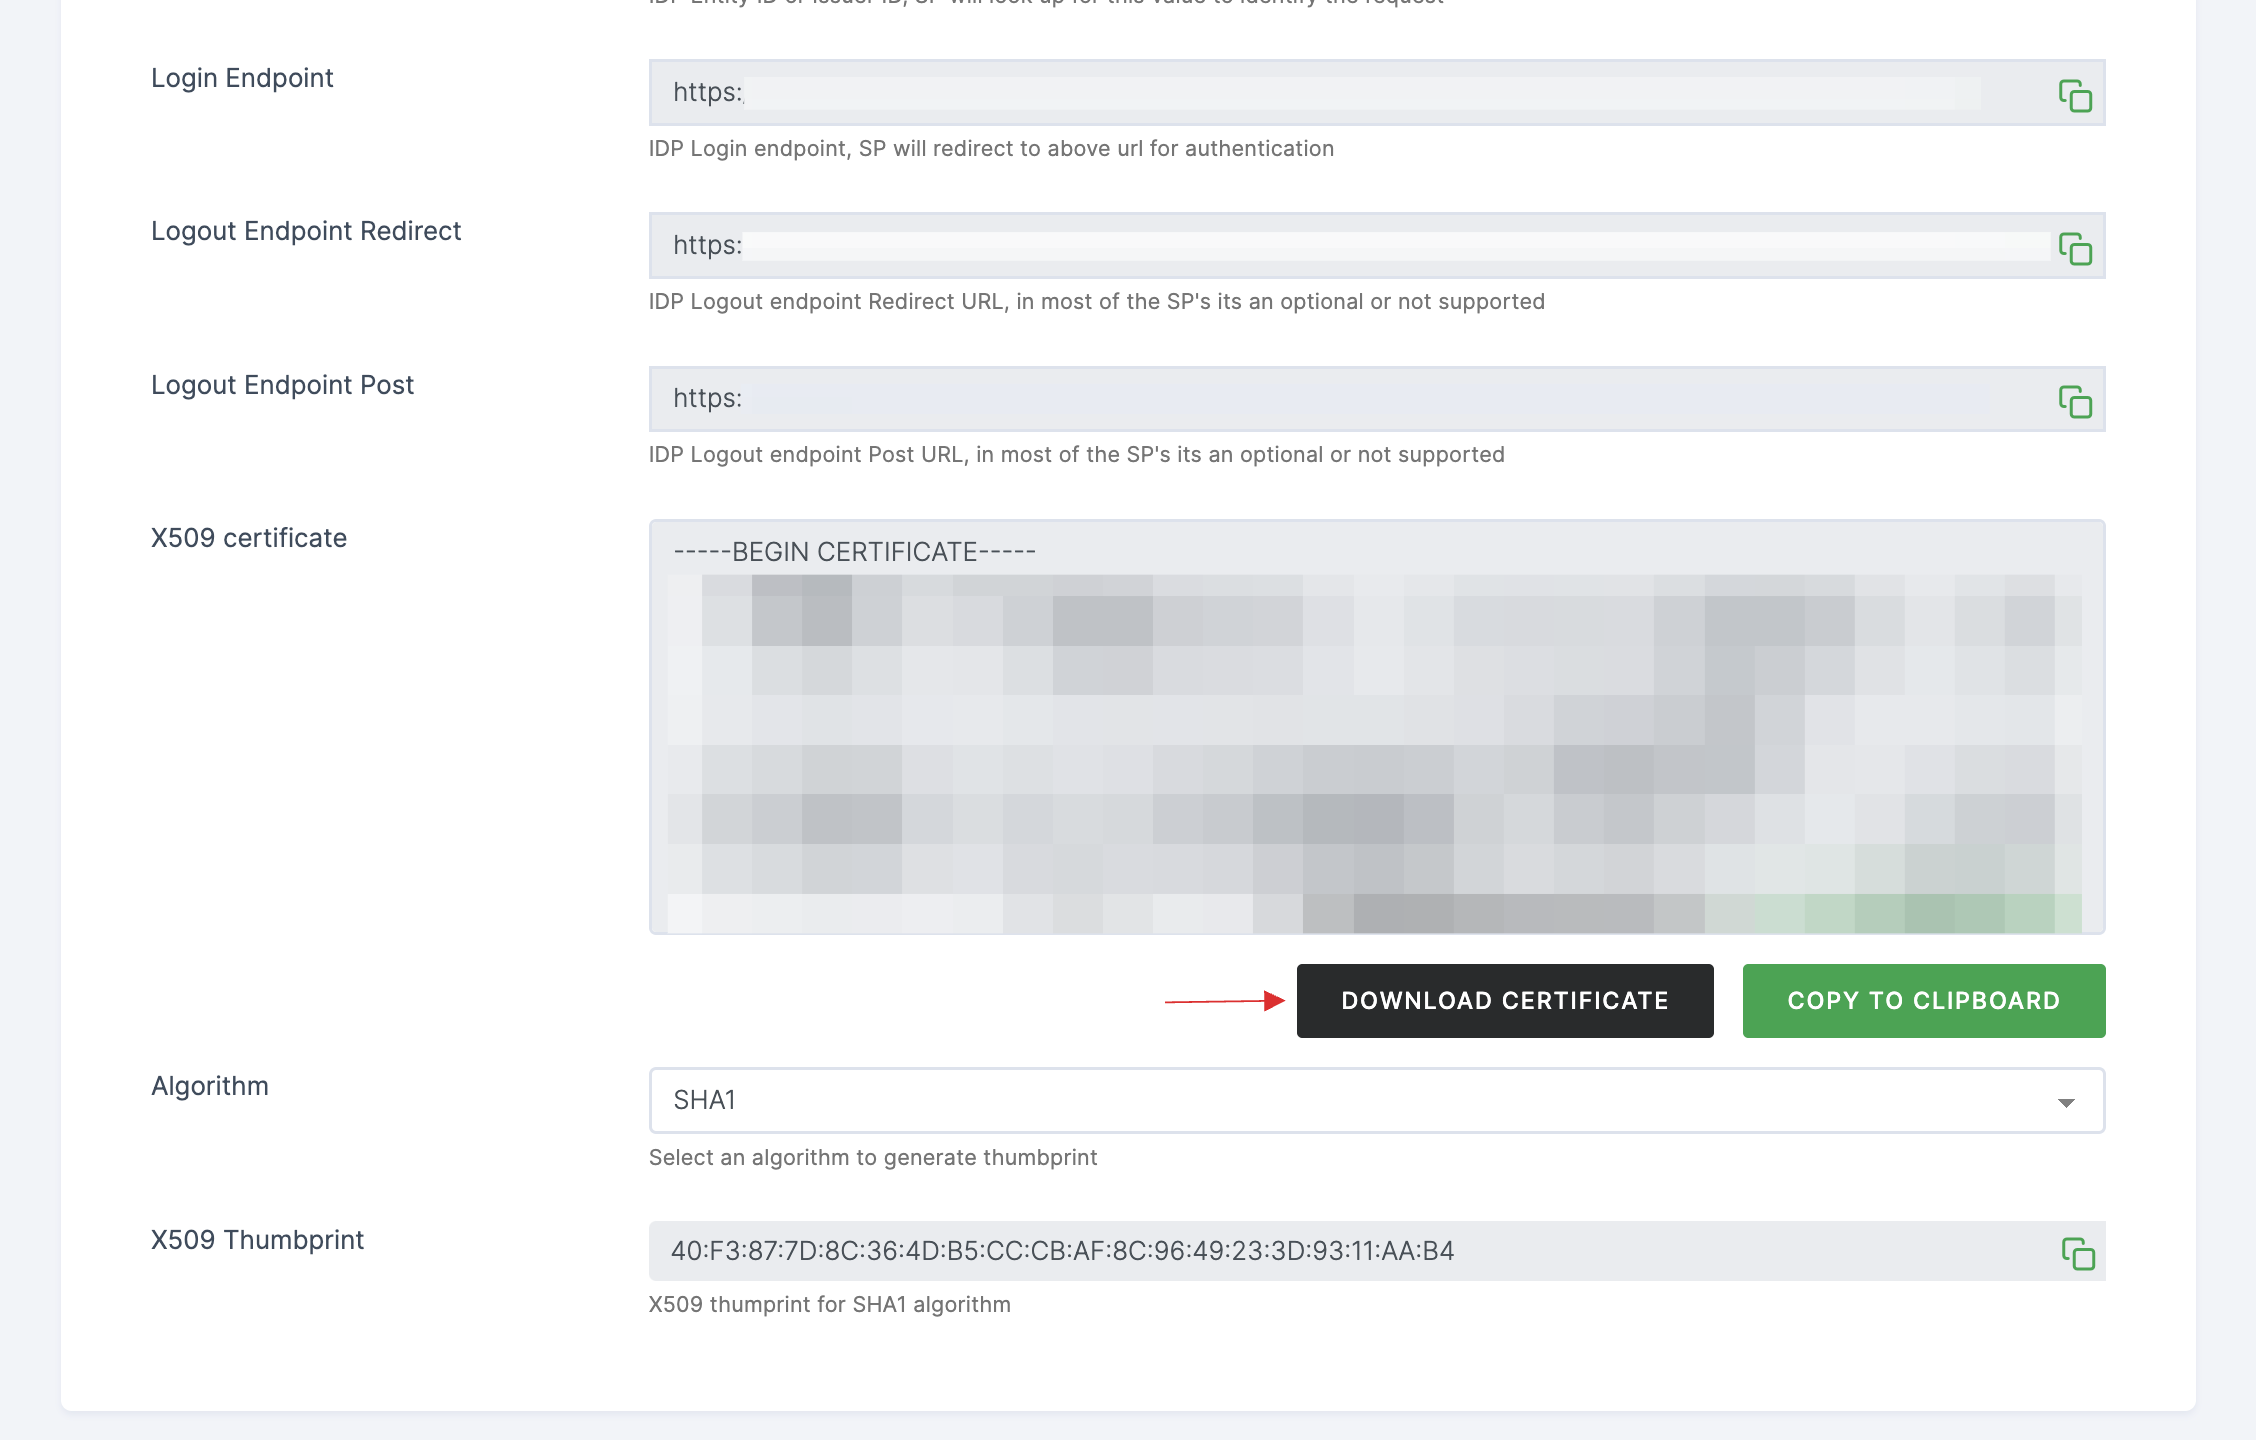
13 Return to your dashboard, click on DOWNLOAD CERTIFICATE.
Change the downloaded file name from .pem to .cer
14 Switch to Dell Boomi, click on Import.

15 Select certificate.cer from the file upload menu. Click on Finish.

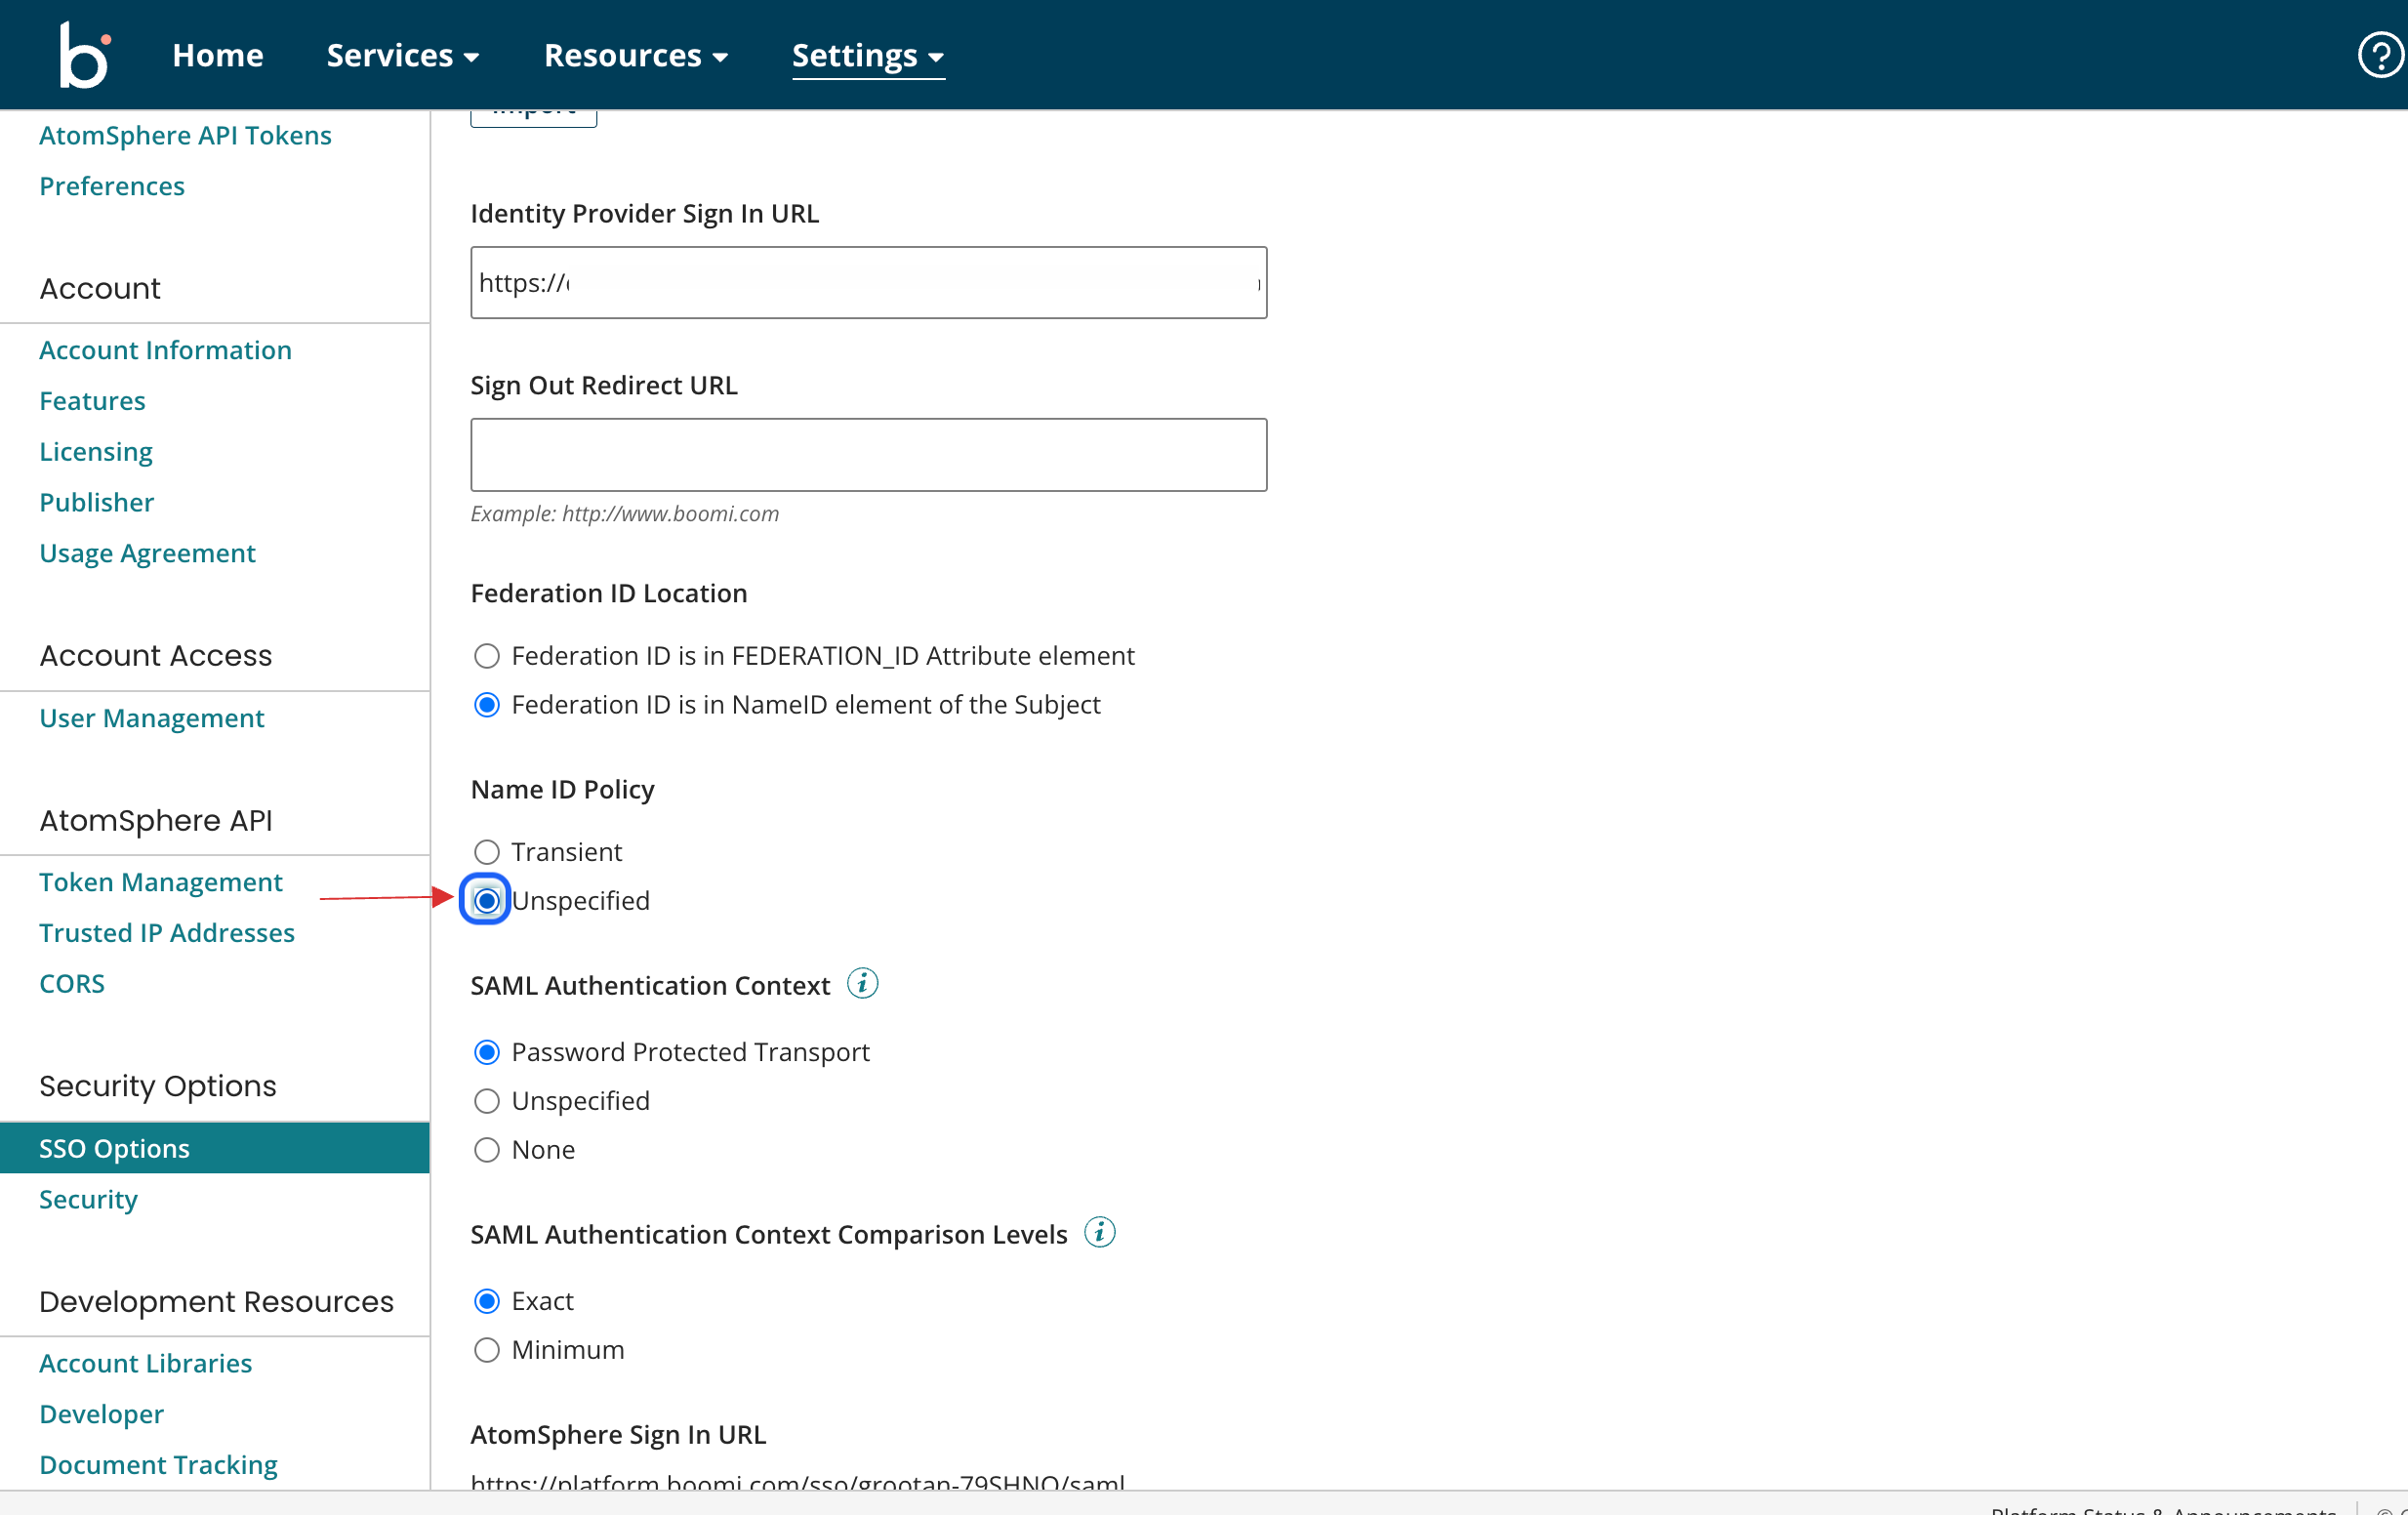
16 Scroll down, check Federation ID is in NameID element of the Subject for Federation ID Location.
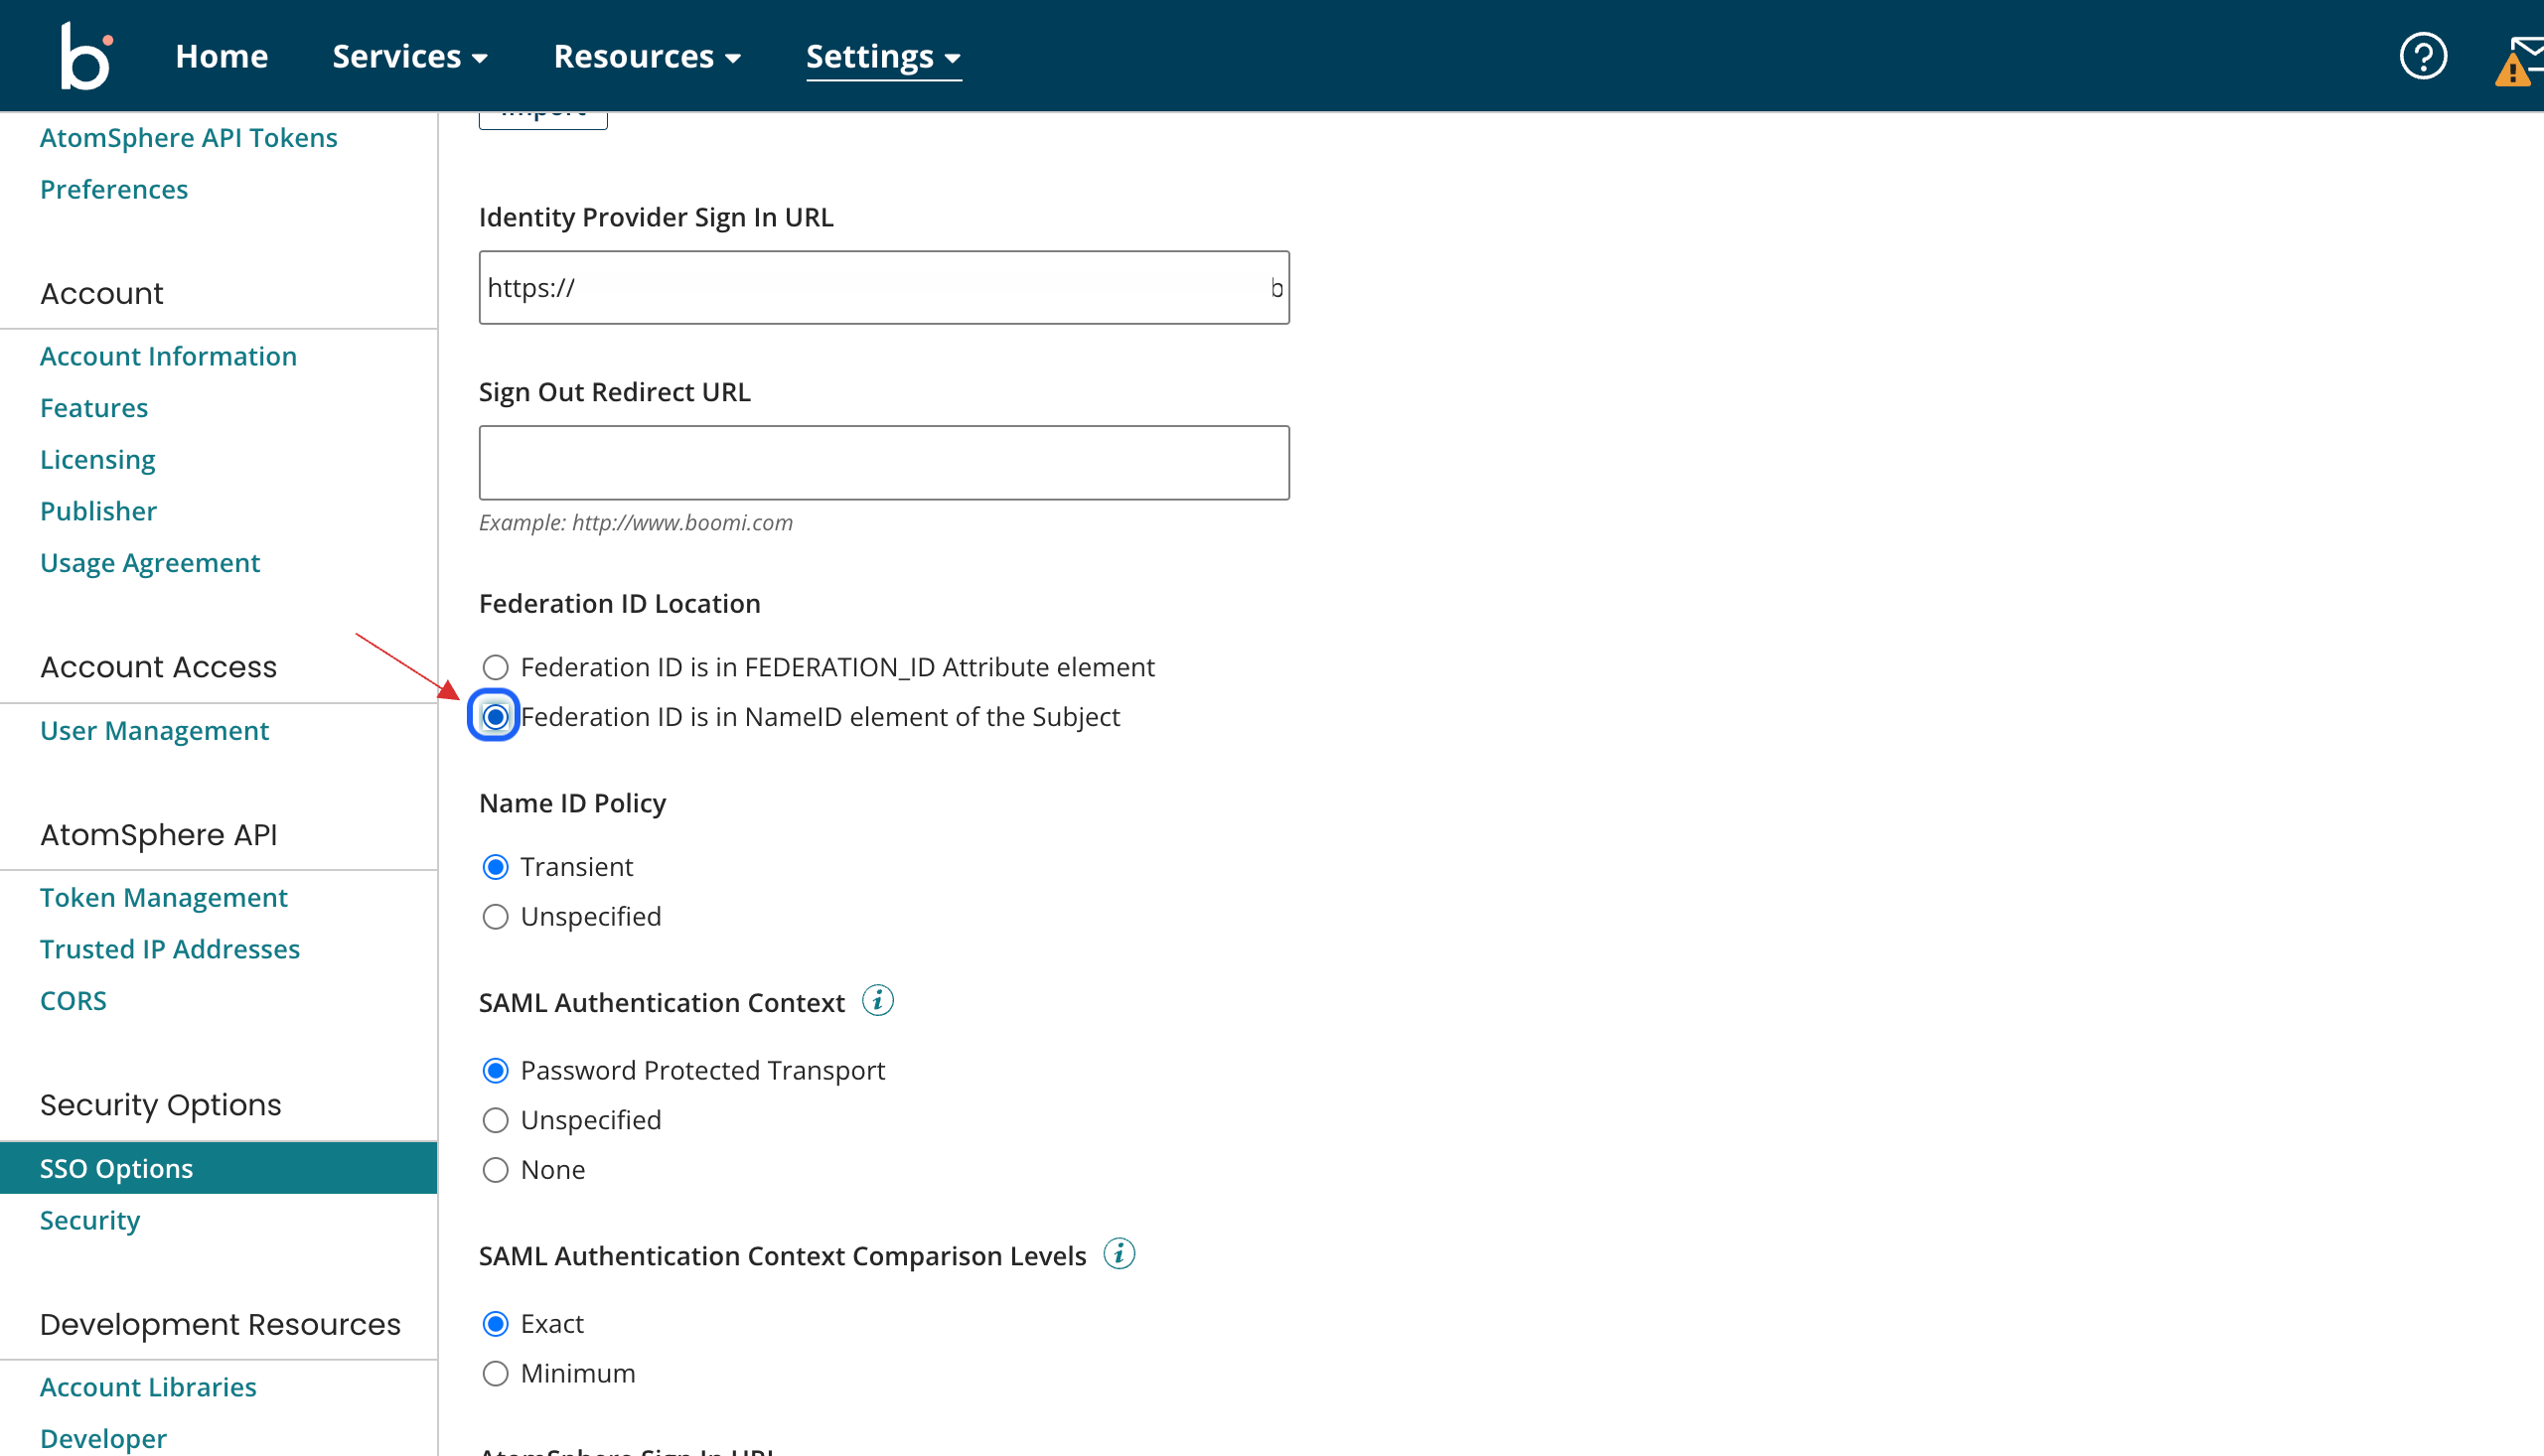
17 Check Unspecified for Name ID Policy.
18 For SAML Authentication Context, check None.
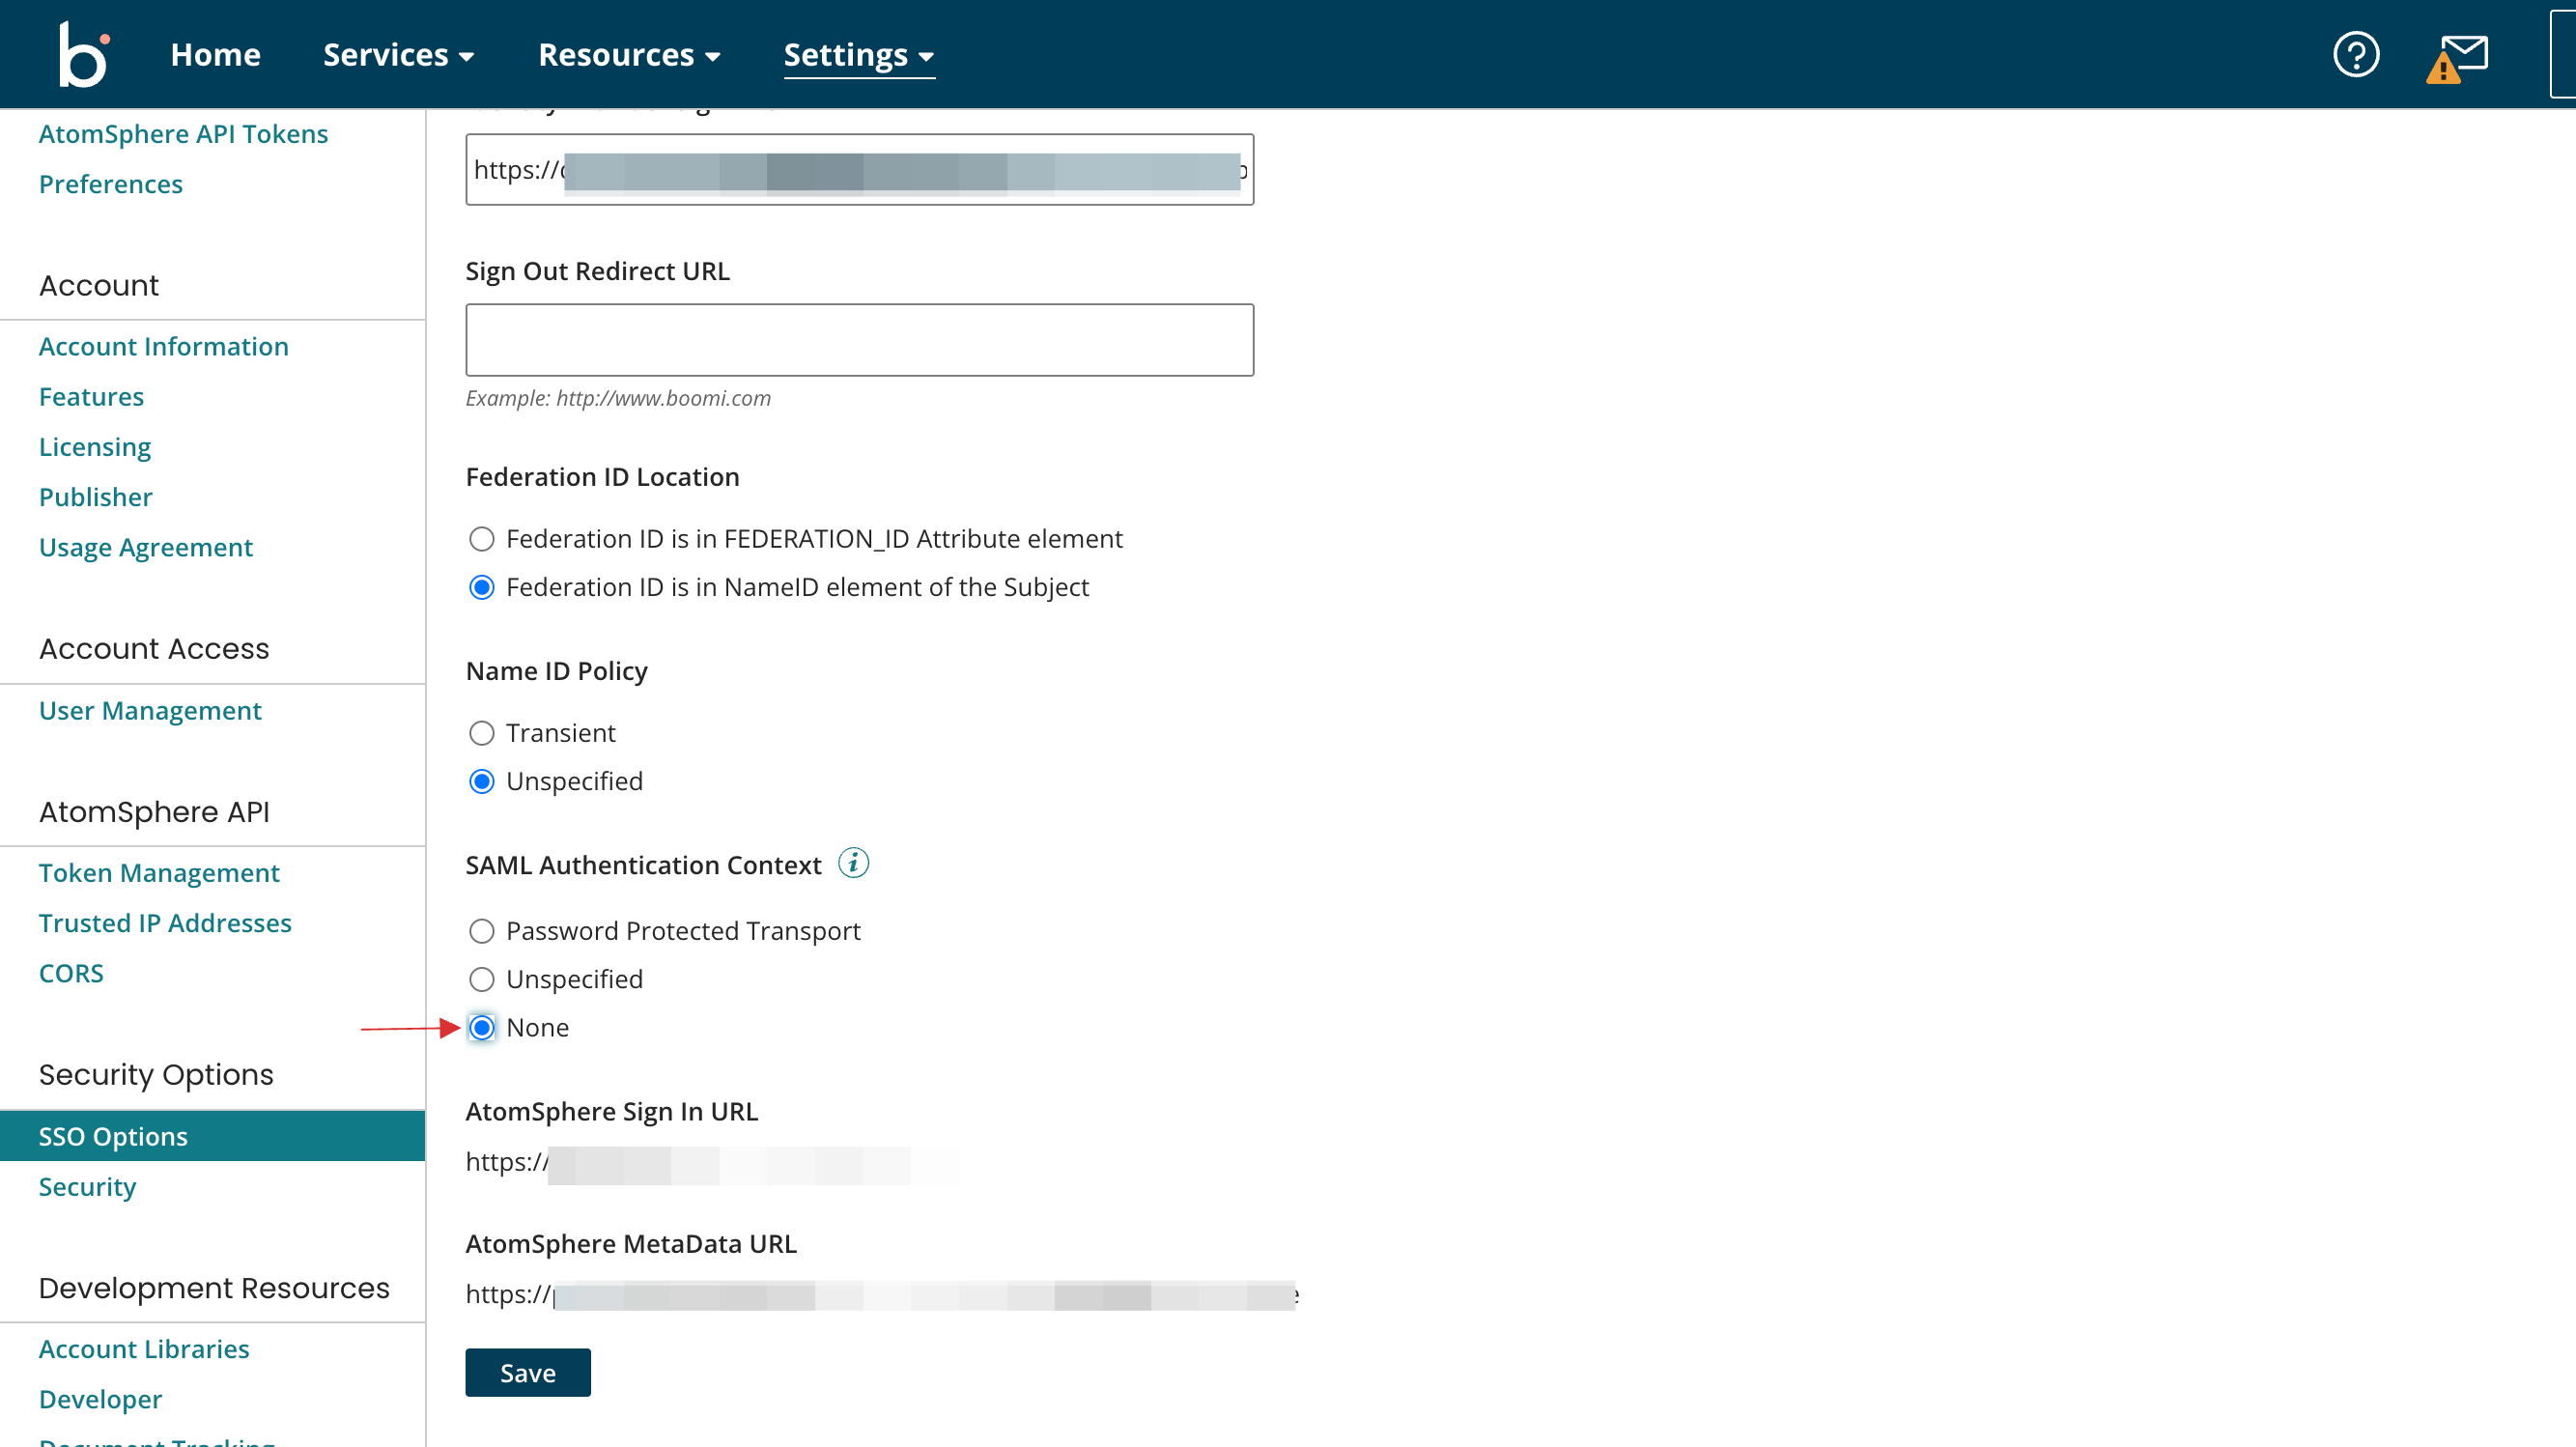
19 Click on Save.
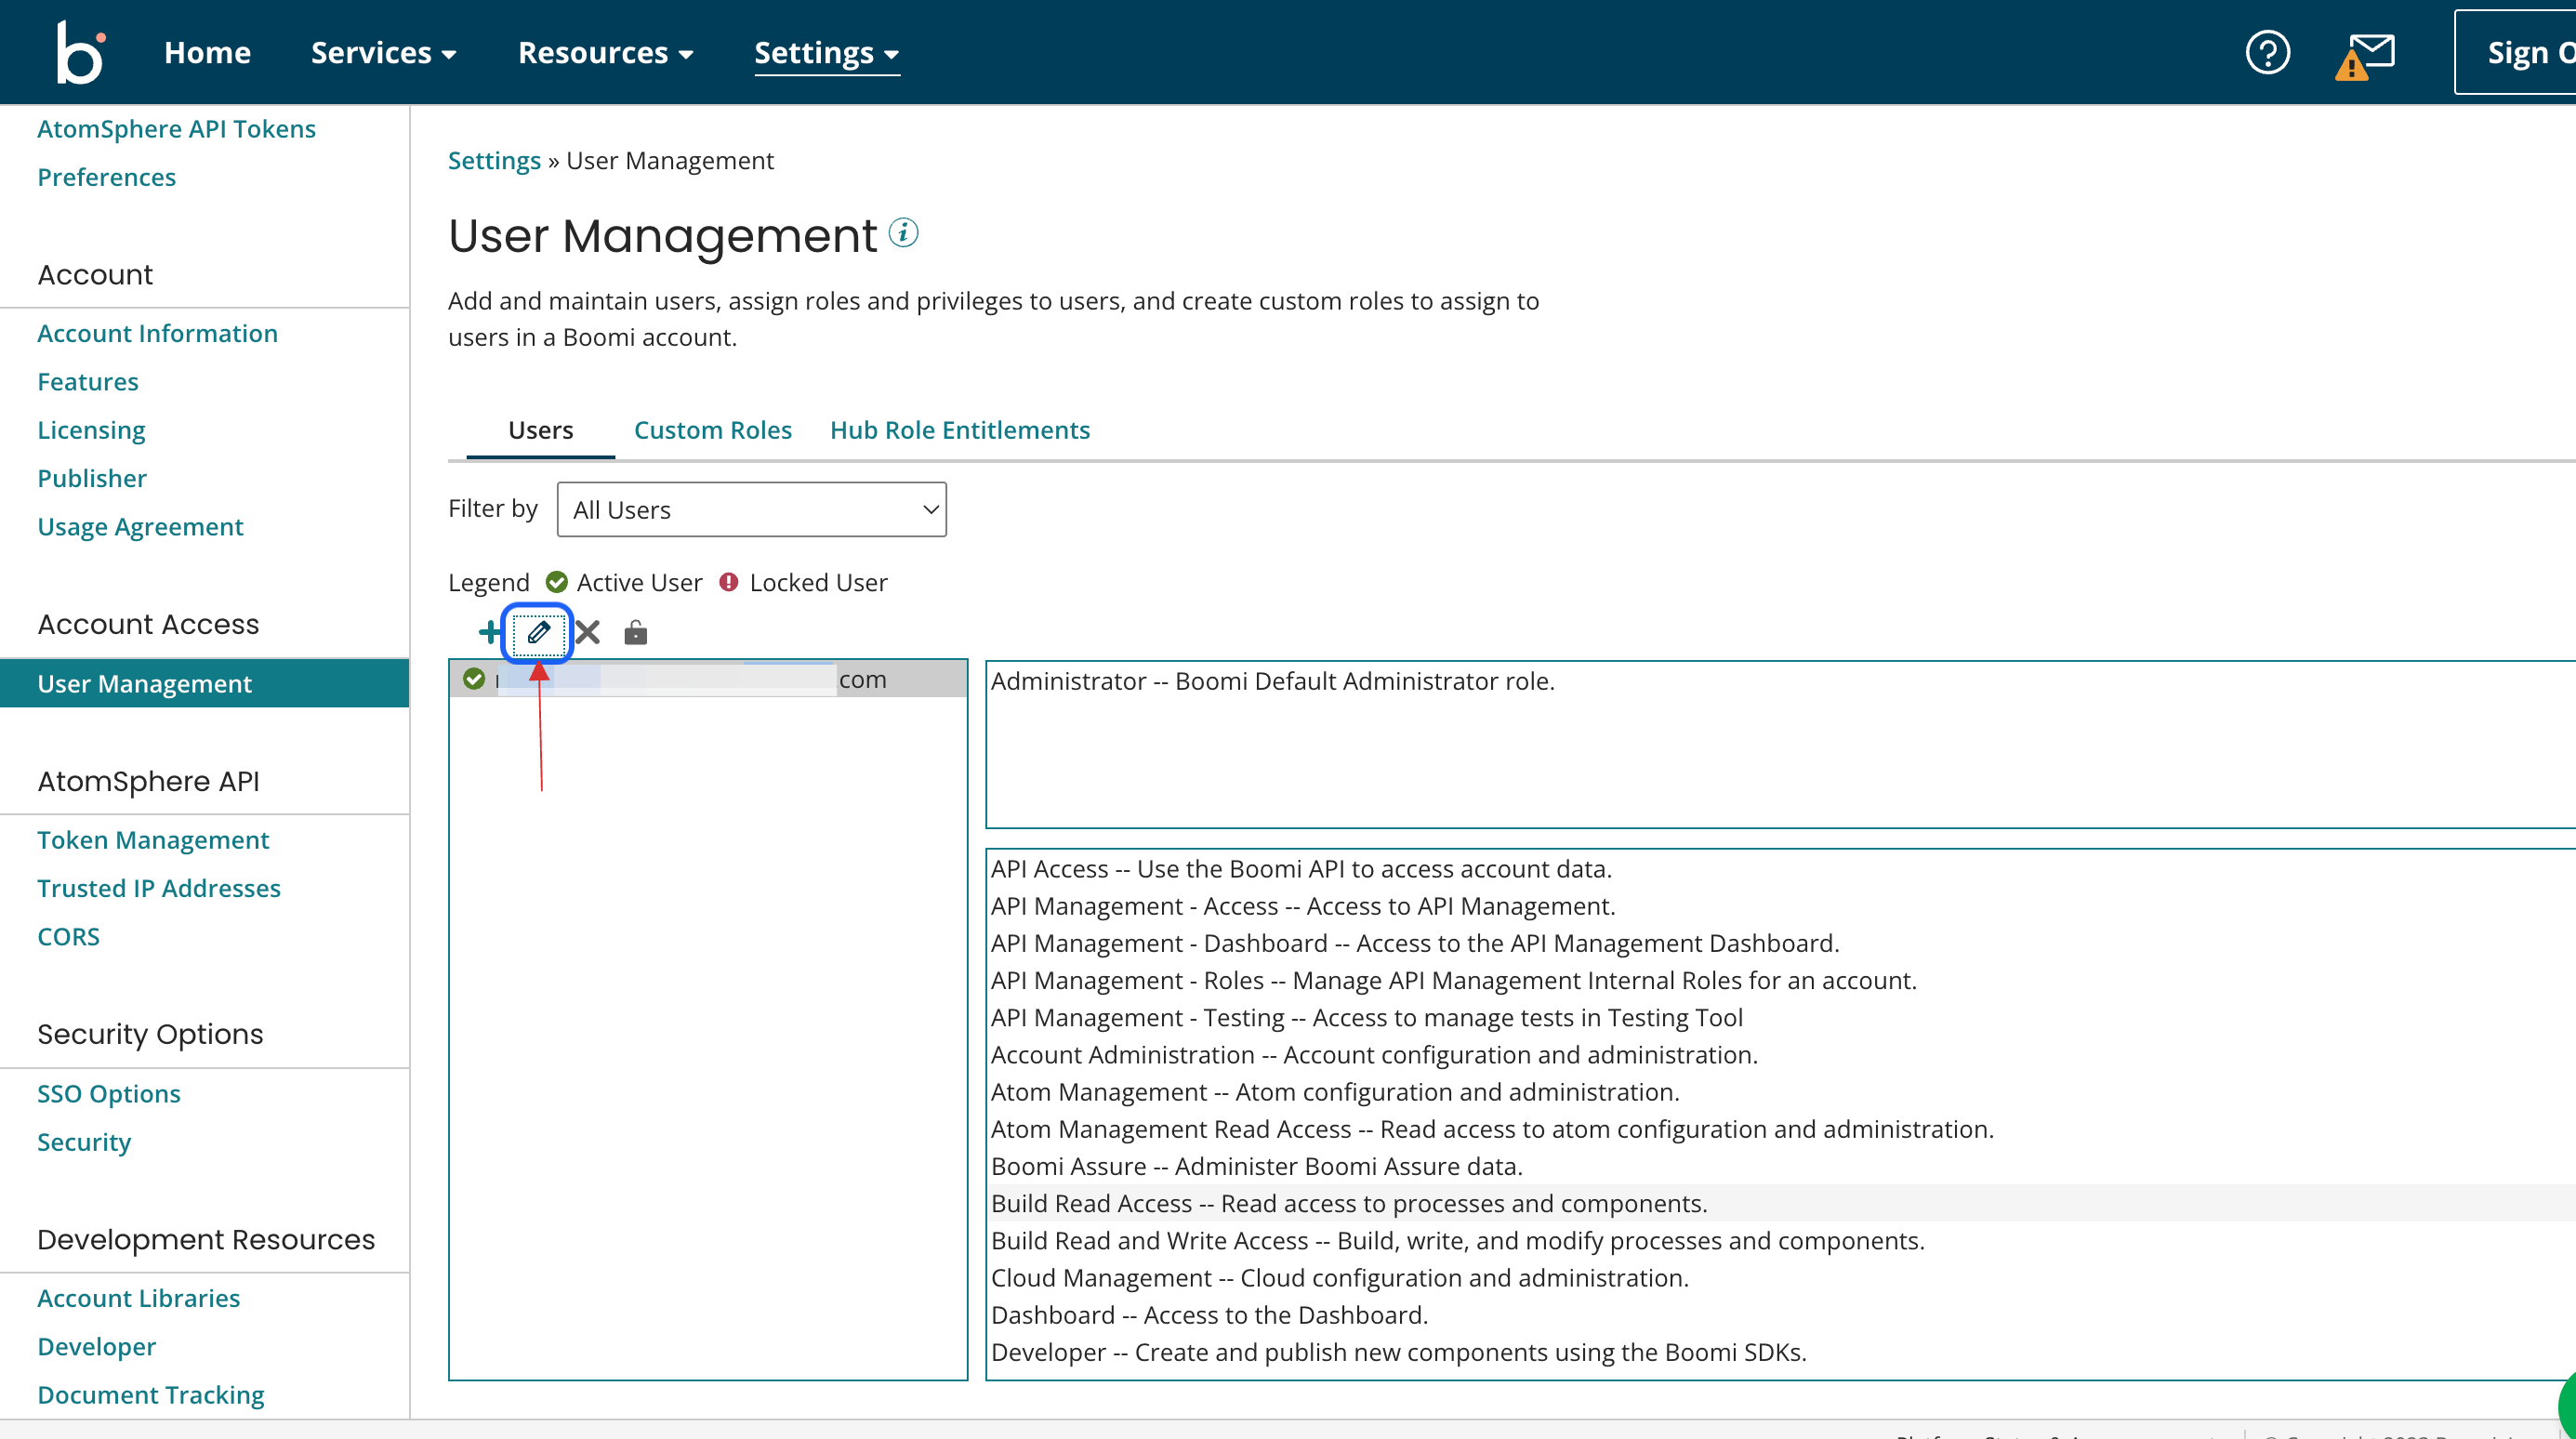
20 Navigate to User Management, under Account Access.
21 Click on the edit icon.
22 Provide the User email address in the Federation ID field. Click on OK.

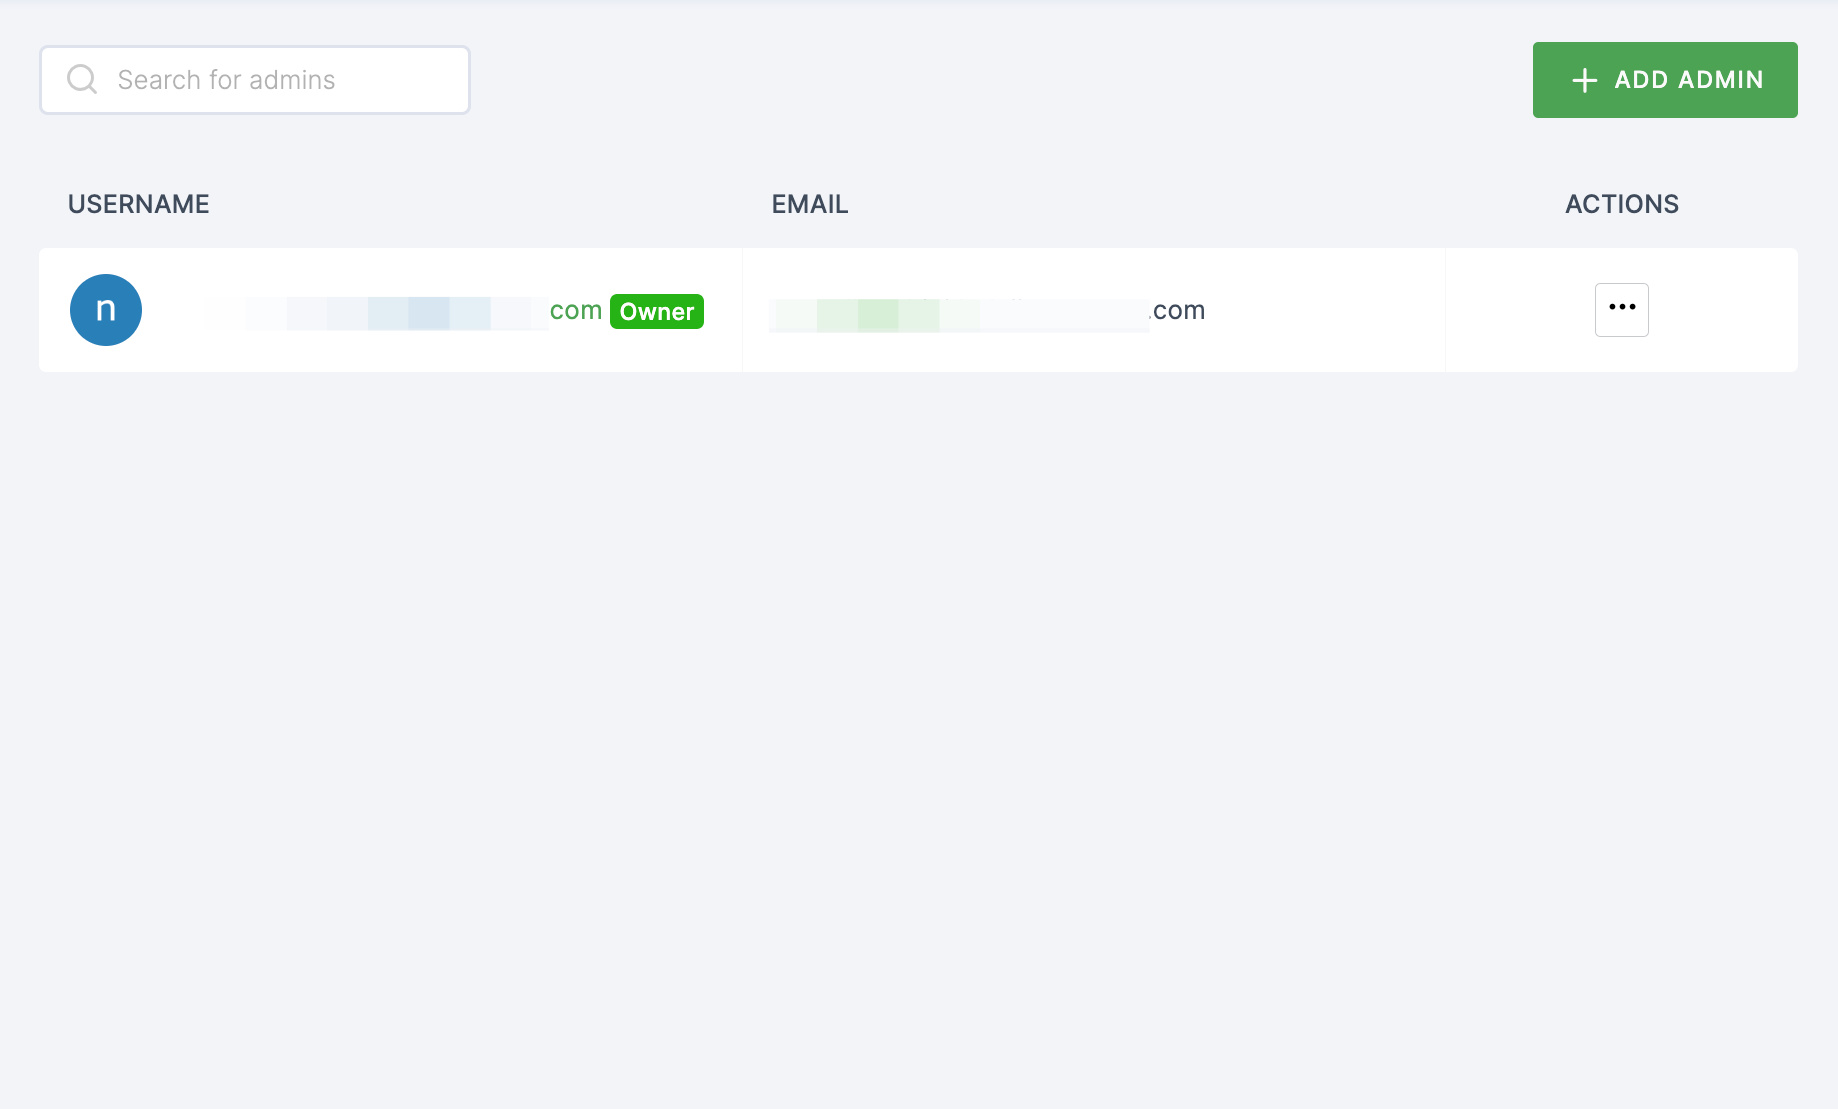
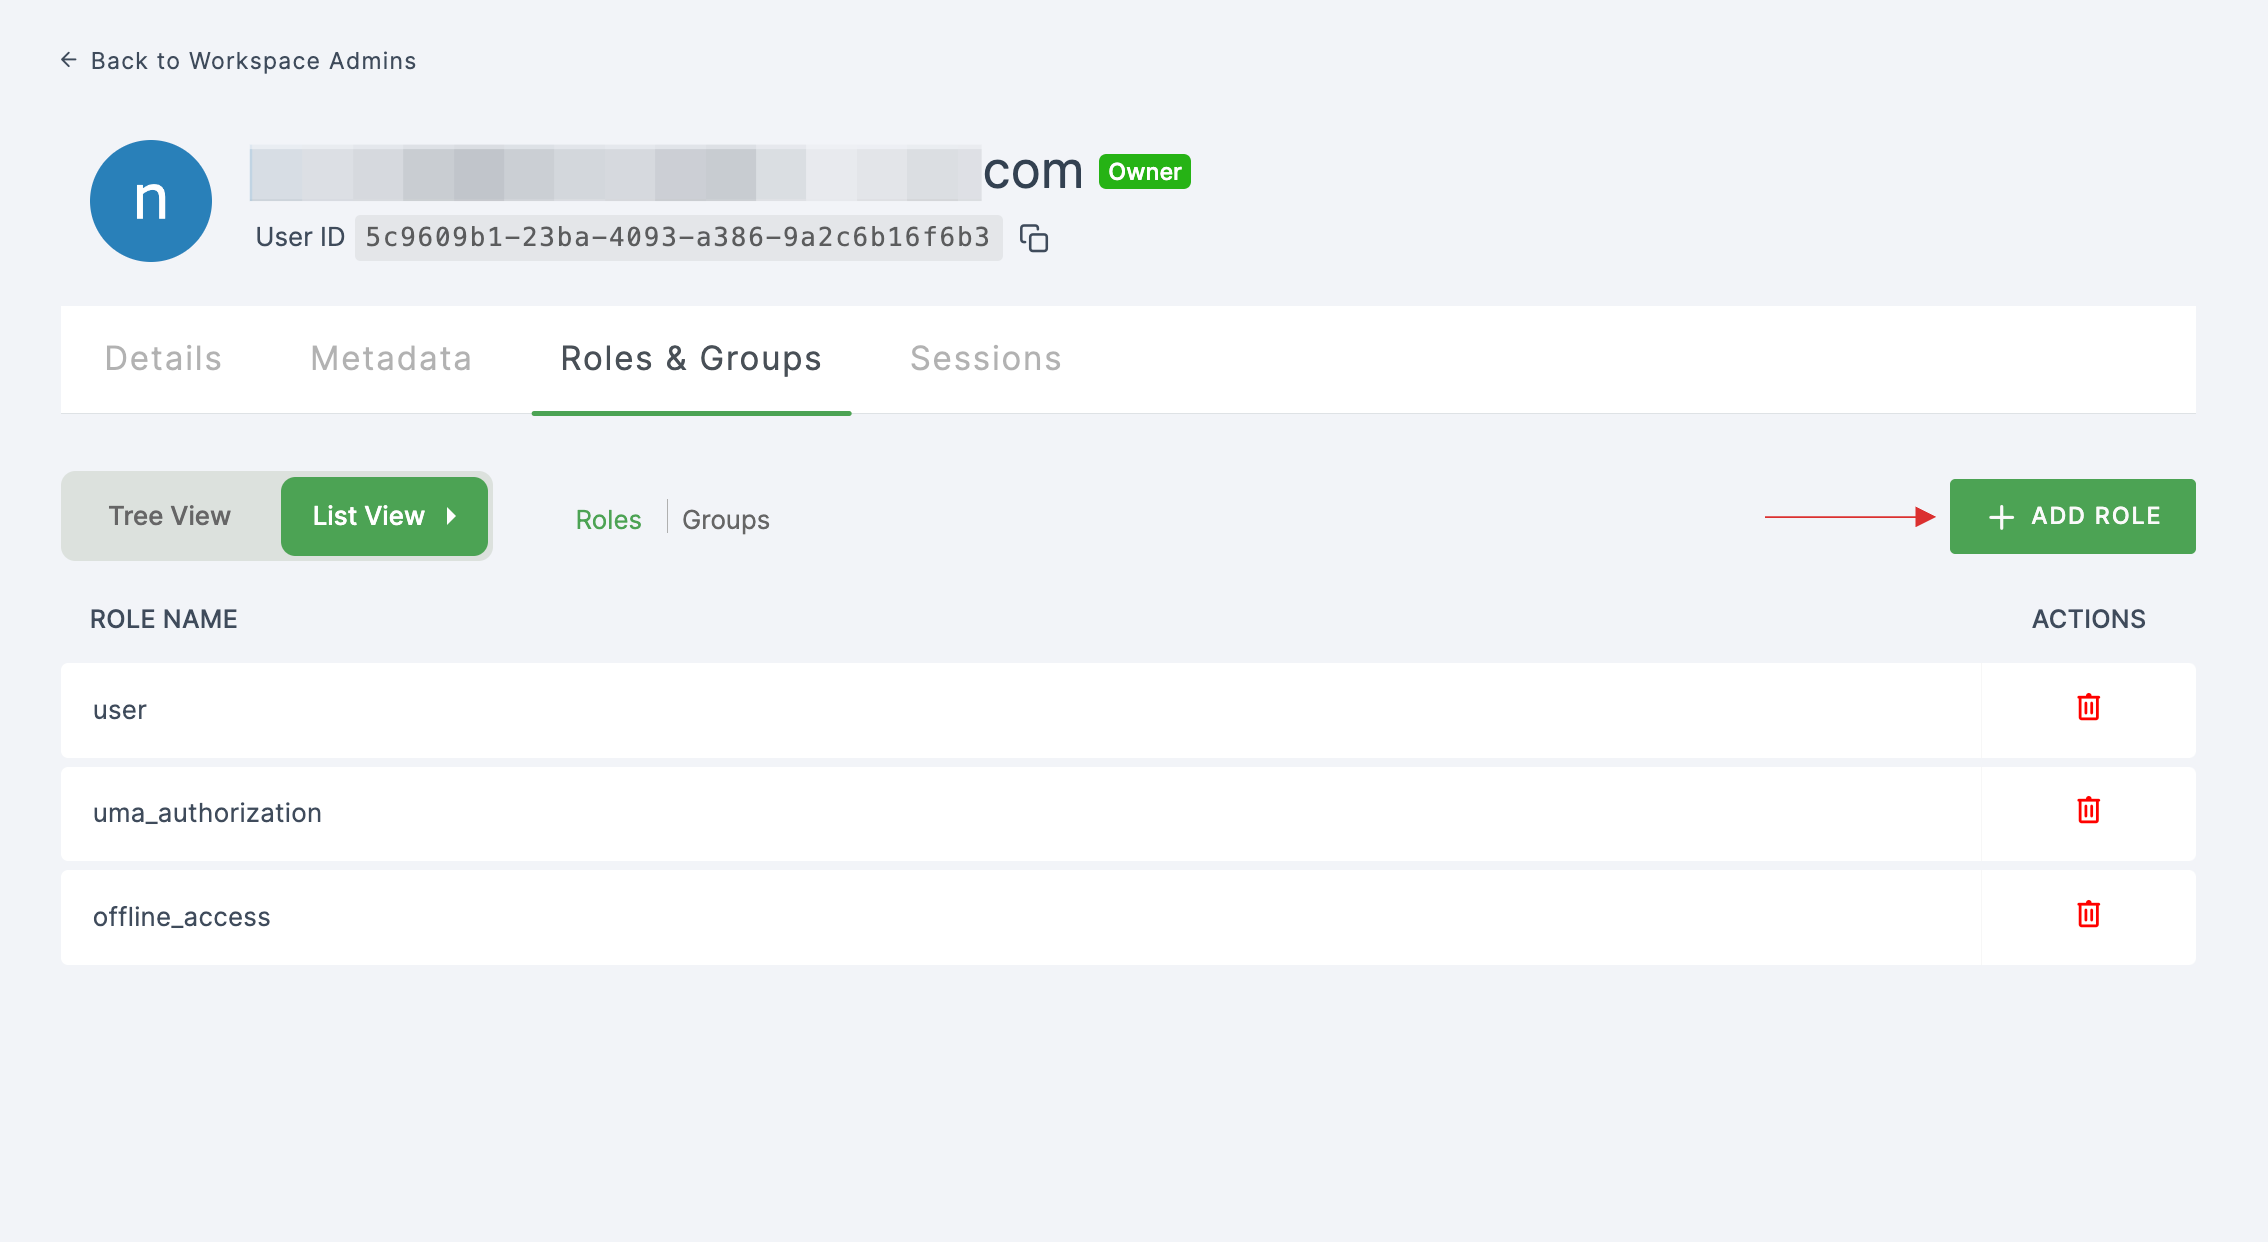
23 Return to your dashboard, assign a user with Dell Boomi role. To do so, navigate to Users or Workspace Admins, click on the user you want to assign the role.
24 You will be taken to the user's Details tab, click on Roles & Groups.
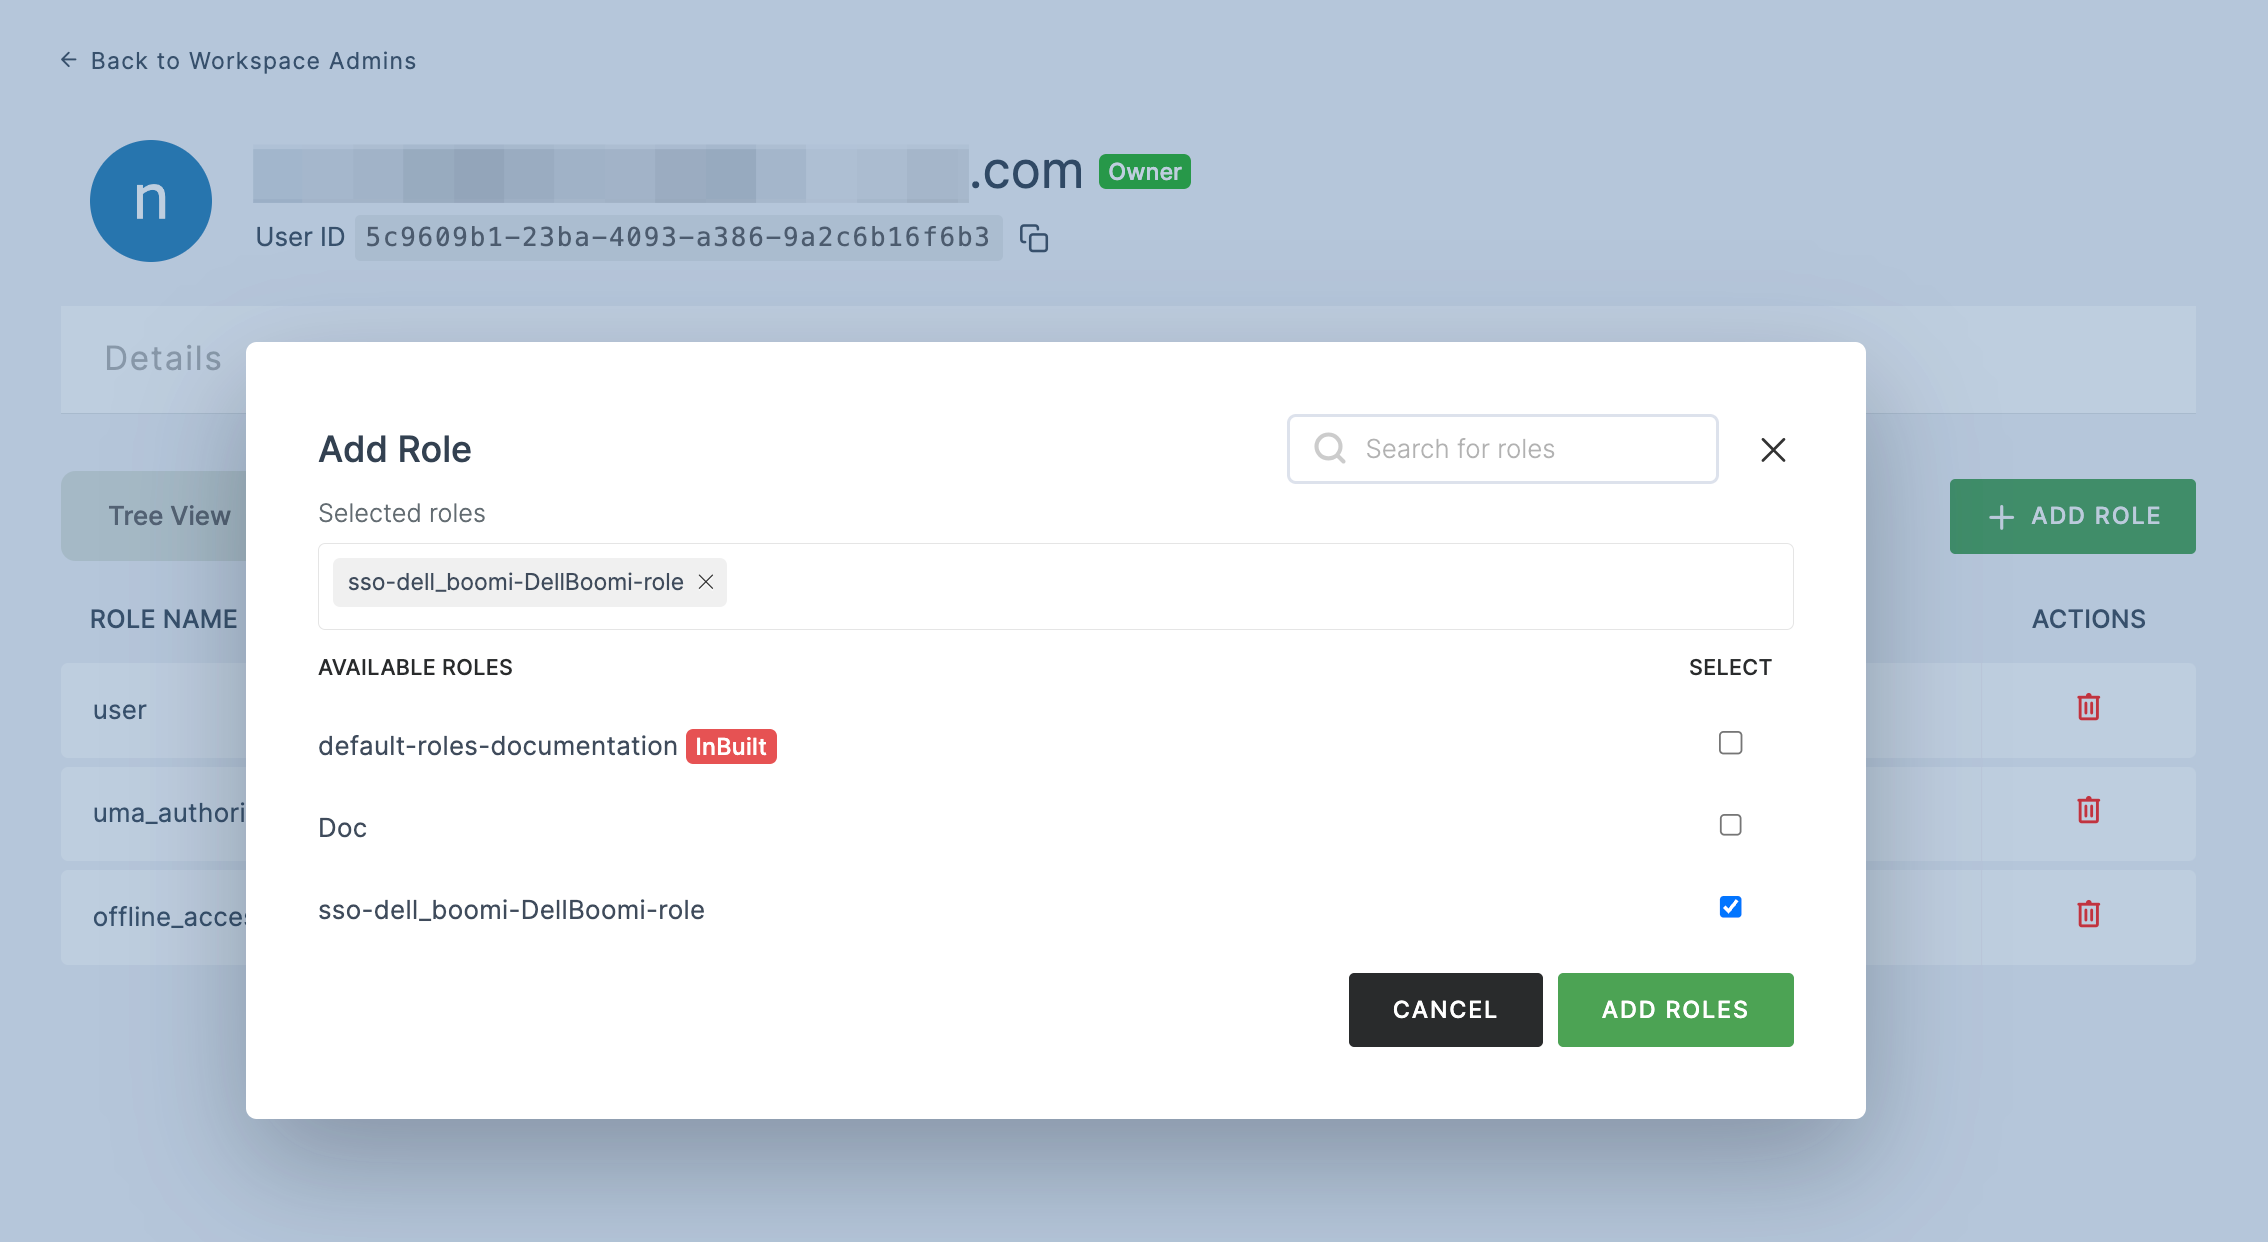
25 Select List View and click on + ADD ROLE.
26 The available roles will appear; select sso-dell-boomi-Dell-Boomi-role and click on ADD ROLES.
27 To verify whether SSO has been successfully enabled, go to Applications > SSO, click on SSO DASHBOARD button.
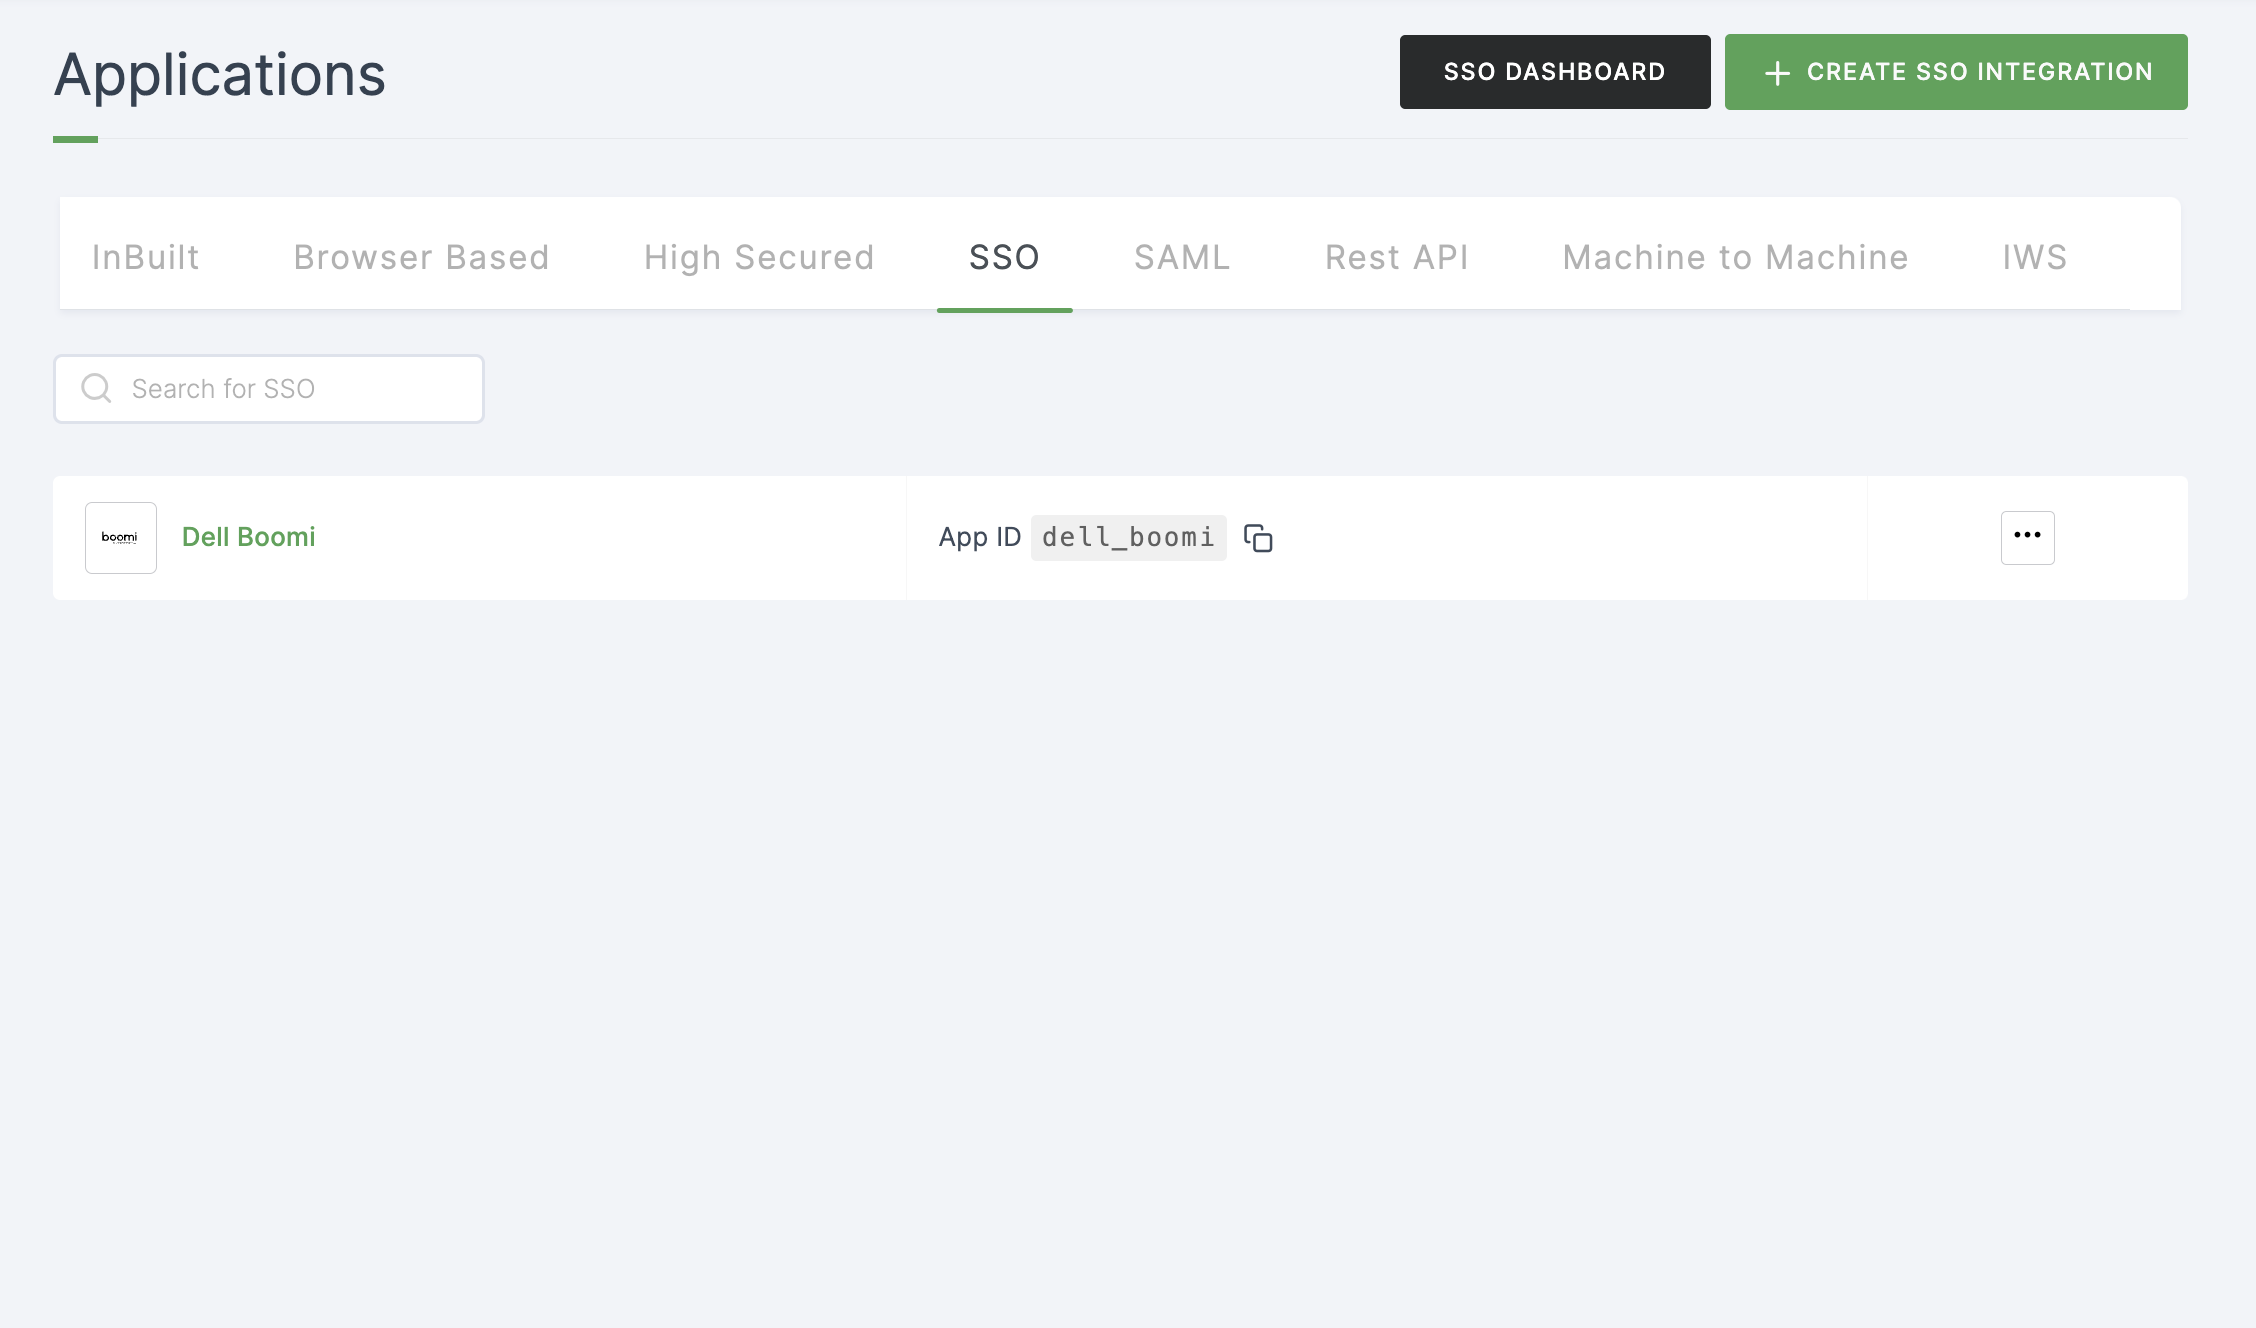
28 The Dell Boomi SSO will be enabled successfully.